How to Remove Car Scratches at Home Cheaply: Full DIY Guide
Somebody keyed your door in a parking lot. Or a shopping cart kissed your bumper. Or a branch dragged along the fender on a narrow road. Whatever happened, you’re now staring at a scratch every time you walk up to your car — and the body shop quoted $400 for what looks like a minor mark. Here’s the good news: most scratches never need a body shop. If you can learn to read how deep the scratch goes, you can fix the majority of them at home for under $30 with results that genuinely surprise people. Here’s the complete method, from diagnosis to final polish.
First: Diagnose How Deep the Scratch Is
Your car’s paint is a layer cake: clear coat on top, color coat (base coat) beneath it, primer under that, then bare metal. The fix depends entirely on which layers the scratch breached. Run your fingernail across it:
Fingernail doesn’t catch: the scratch is in the clear coat only. This is the easy win — polishing alone will usually remove it completely.
Fingernail catches slightly, but you see color in the scratch: it’s through the clear coat into the color coat. Fixable at home with touch-up paint plus polishing, with good to very good results.
You see gray primer or shiny metal: it’s through to primer or bare metal. Home repair can still make it far less visible, but a truly invisible repair usually needs professional respraying — and bare metal will rust if left exposed, so don’t ignore it.
This diagnosis step is where DIY attempts succeed or fail. Treating a primer-deep scratch with polish alone just wastes an afternoon; treating a clear-coat scuff with touch-up paint makes it worse. Having basic repair tools on hand helps, but the real tool here is accurate assessment.
Level 1: Clear-Coat Scratches (The 15-Minute Fix)
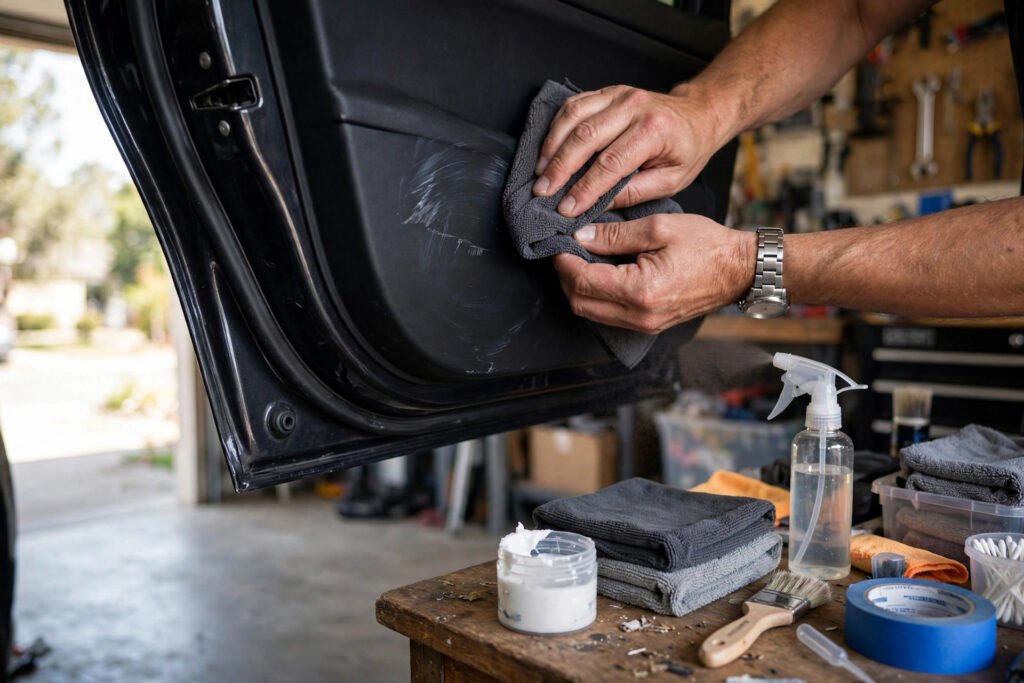
Wash and dry the area thoroughly — polishing over dirt grinds new scratches in. Then apply a small amount of polishing compound (not rubbing compound, which is more aggressive) to a foam applicator pad or clean microfiber cloth. Work in small circles with moderate pressure for a couple of minutes, then wipe clean and inspect. For most light scratches, one or two passes erase them entirely.
For slightly stubborn clear-coat marks, step up to a fine scratch remover, then finish with the polish. The whole job costs under $15 in materials you can buy at any American auto parts store. Finish with a coat of wax or sealant to protect the freshly polished clear coat — polishing removes a microscopic layer, and you want that area protected again. Consumer Reports car-care advice consistently ranks regular waxing among the highest-value paint protection habits.
Level 2: Color-Coat Scratches (Touch-Up Paint Done Right)
Find your exact paint code — it’s on the driver’s door jamb sticker or under the hood. Order the factory-matched touch-up paint (the pen or small bottle, $15 to $25); generic “close enough” colors always look wrong.
Clean the scratch with isopropyl alcohol. Apply the paint in thin layers with the pen’s fine tip or a toothpick — never glob it on. The secret professionals use: apply slightly less than you think you need, let each layer dry fully (30+ minutes), and build up until the paint sits just barely proud of the surface. Once cured (wait at least 24 hours), wet-sand very lightly with 2000-grit sandpaper wrapped around a small foam block, then polish with compound to blend. Done patiently, this repair is invisible beyond a few feet — and it seals the paint against rust.
Level 3: Primer and Metal (Damage Control)
If primer or metal shows, the priority shifts from cosmetics to corrosion prevention. Clean the area, apply touch-up primer if metal is exposed, then color coat in thin layers as above. The result won’t be showroom-perfect — deep scratches repaired at home typically remain slightly visible on close inspection — but you’ll stop rust and make the damage dramatically less noticeable for under $30.
Be realistic about the limits: scratches spanning whole panels, dents accompanying the scratch, or damage on highly visible areas of dark-colored cars (black shows everything) may justify the professional quote after all. A $400 body shop repair on a car you’re selling soon often pays for itself in resale value — keeping the car’s appearance sharp is part of protecting curb appeal on a budget, whether it’s your house or your vehicle.
Preventing the Next Scratch
Repair is satisfying; prevention is cheaper. The majority of cosmetic car scratches come from a handful of avoidable sources. Park defensively: end spots and spots next to curbs (rather than between two cars) dramatically reduce door-ding risk — the extra 30-second walk is worth it. Keep a safe distance from the car ahead on gravel roads and behind trucks, where most paint chips originate. When washing, use the two-bucket method with a grit guard and a microfiber mitt — automatic car washes with brushes and single-bucket hand washing cause the fine swirl scratches that dull paint over time.
For ongoing protection, a quality wax or synthetic sealant every 3–6 months adds a sacrificial layer that absorbs light scratches before they reach your clear coat. Paint protection film on high-impact areas (front bumper, hood leading edge, mirrors) is the professional-grade solution — it’s not cheap ($500–$2,000 for partial coverage), but it’s the only thing that truly prevents rock chips. And address small chips promptly with touch-up paint: a 30-second dab today prevents the rust spot that needs a $300 repair next year. Prevention compounds — the cars that look new at year ten are the ones whose owners sweated the small stuff. For model-specific paint care schedules, Edmunds DIY car maintenance tips are a solid reference.
What NOT to Do
Skip the internet folk remedies. Toothpaste is sometimes suggested as a polish — it’s inconsistently abrasive and often hazes the clear coat. WD-40 temporarily hides scratches by filling them with oil, then washes off in the first rain. Colored wax crayons look absurd up close. And never use coarse sandpaper or aggressive rubbing compound on a modern clear coat unless you know exactly what you’re doing — you can burn through the clear coat in seconds, turning a $20 fix into a $400 respray.
Conclusion
Most car scratches are clear-coat or shallow color-coat damage that yields to a $15 bottle of polish or a $20 touch-up pen and an hour of patience. Diagnose the depth with the fingernail test, match your method to the damage, work in thin layers, and finish with protection. You’ll fix 80 percent of scratches at home for pocket change — and you’ll know exactly when a scratch is deep enough to justify paying a professional instead of making it worse.
Frequently Asked Questions
Can I really fix a car scratch myself?
Yes for clear-coat and shallow color-coat scratches — polishing compound and factory touch-up paint handle these well. Deep scratches to primer or metal can be improved but rarely made invisible at home.
How do I find my car’s paint code?
Check the driver’s door jamb sticker, under the hood, or in the owner’s manual. Enter the code when ordering touch-up paint to get an exact factory match.
Does toothpaste actually remove scratches?
Not reliably. Its abrasiveness varies wildly between brands, and it frequently hazes the clear coat. A proper $10 polishing compound works far better and more predictably.
How much does a professional scratch repair cost?
Typically $150-$400 per panel for professional touch-up and blending, more for full panel resprays. Deep scratches on luxury or pearl/metallic finishes cost more.
Will a scratch rust if I ignore it?
Only if it reaches bare metal. Clear-coat and color-coat scratches won’t rust, but any scratch showing shiny metal should be sealed promptly to prevent corrosion.