Smoky Eye for Total Beginners: The Forgiving 5-Step Method
The smoky eye is makeup’s most requested and most feared look. Every beginner has the same trauma: you aim for sultry evening glamour and end up looking like you lost a fight — raccoon eyes, harsh lines, fallout everywhere. Here’s the reassuring secret professionals know: the smoky eye is actually one of the easiest looks to do well, because it’s supposed to be blended and imperfect. Precision is the enemy; diffusion is the goal. This is the true beginner method — no cut creases, no ten-brush techniques, just a forgiving, buildable approach that works the first time.
The Mindset Shift: Smoky = Blended, Not Dark
Beginners think “smoky” means “a lot of black eyeshadow.” Professionals know it means “seamless gradient from dark to light with no visible edges.” A smoky eye done in soft browns with perfect blending looks infinitely better than black shadow with harsh lines. Start with browns and taupes — they’re forgiving, suit everyone, and teach the technique. Graduate to charcoal and black once blending is muscle memory.
What You Actually Need (The Minimal Kit)
Forget the 12-brush sets. You need: an eyeshadow primer (non-negotiable — it prevents creasing, intensifies color, and extends wear from 3 hours to 10); three shadows — a medium transition shade (matte, close to your skin tone but deeper), a dark shade (matte brown/charcoal for the outer corner and lash line), and a light shimmer (inner corner and brow bone); two brushes — a fluffy blending brush and a smaller packing brush (a flat shader); eyeliner (a kohl pencil you can smudge, not a precise liquid); mascara. That’s the entire kit — and the FDA’s eye cosmetic safety guidance is worth reading before putting anything near your eyes. Technique matters more than product count — the same principle as working with flattering colors: the right shades in the right placement beat expensive palettes applied randomly.
The Step-by-Step Beginner Method
Step 1: Prime
A thin layer of eyeshadow primer from lash line to brow bone, set with a dusting of translucent powder or the light matte shade. This creates the grippy, even base that makes everything else blendable. Skipping primer is the number one reason beginner smoky eyes crease and fade within hours.
Step 2: The transition shade (the “windshield wiper”)
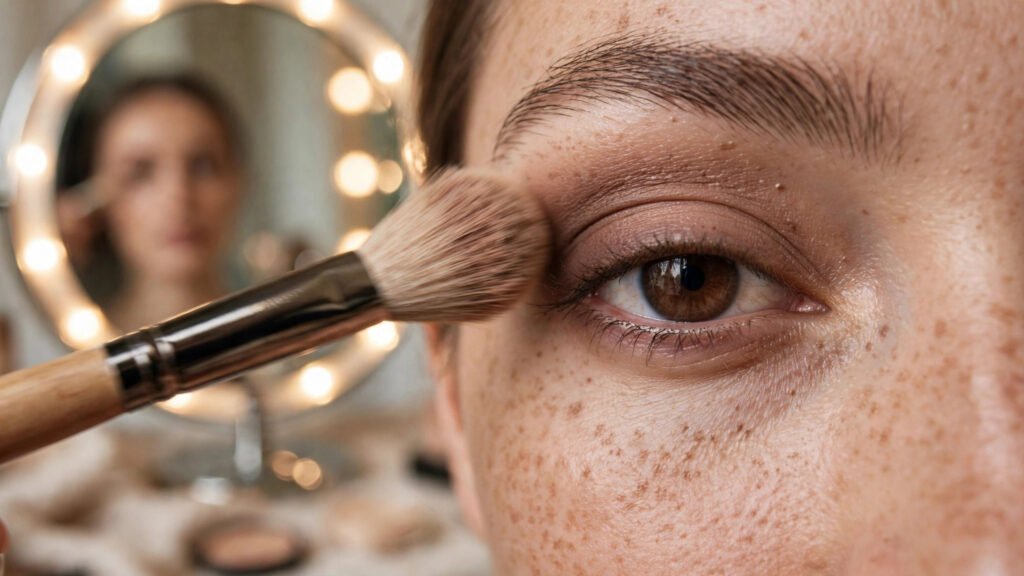
With the fluffy brush, sweep the medium matte shade back and forth in the crease like a windshield wiper. This is the blending layer that makes everything else look seamless — spend real time here, 1–2 minutes. It should look like a soft wash of color with no edges. This single step separates amateur from professional results.
Step 3: Darken the outer V
With the smaller brush, pat (don’t sweep) the dark shade onto the outer third of the lid and into the outer crease, forming a sideways “V” or “>”. Pat to deposit color, then use the clean fluffy brush to blend the edges into the transition shade. Build in thin layers — three light layers beat one heavy one every time.
The beginner’s cheat: use the “connect the dots” method — place the dark shade, then blend only the edges, never the center. The center stays rich, the edges melt away.
Step 4: Smudge the lash line
Run kohl pencil along the upper lash line (it doesn’t need to be neat — you’re going to smudge it), then immediately smudge with the small brush or a cotton swab. Tightline the upper waterline for definition without a hard line. Smudge a little dark shadow along the lower lash line — outer two-thirds only, blended soft. This lower-lash step is what makes it “smoky” rather than just “dark lid.”
Step 5: Highlight and finish
Light shimmer on the inner corner (instant eye-opening) and just under the brow bone. Clean up any fallout under the eyes with a fluffy brush or makeup wipe — pro tip: do your eye makeup before foundation, so fallout cleanup doesn’t ruin your base. Two coats of mascara, and you’re done.
Beginner Mistakes (and Instant Fixes)
Too dark, too fast: you can always add more; removing is hard. Start with half the product you think you need. Harsh edges: go back with the clean fluffy brush and blend — when in doubt, blend more. Fallout on cheeks: tap excess off the brush before applying; do eyes before face makeup. Closing the eye down: bringing dark shadow too far inward makes eyes look smaller — keep the darkest color on the outer third. Skipping the lower lash line: a smoky eye with bare lower lashes looks unbalanced — even a soft smudge transforms it. Matching the intensity to daytime: a full black smoky eye at 2 p.m. reads costume; brown/taupe smoky works day to night — reserve the drama for evenings.
Complete the look with balance — a strong eye wants a quieter lip, and neutral nails keep the overall effect polished rather than overwhelming. Restraint in the supporting cast is what makes the smoky eye the star.
Adapting to Your Eye Shape
Hooded eyes: apply the transition shade above the natural crease (where it’s visible with eyes open), keep the lid color simple, and emphasize the outer V and lash line — most of the work happens where it’s visible. Deep-set eyes: lighter shades on the lid bring them forward; keep dark colors tight to the lash line. Close-set eyes: keep dark colors on the outer corners only, highlight the inner corners generously. Round eyes: extend the outer V slightly outward and upward for an elongated effect. The AAD’s makeup tips include advice on keeping eye cosmetics from irritating sensitive eyes.
Leveling Up: The Full Evening Version
Once the beginner method is comfortable, the full-glam smoky eye adds three elements. Depth layering: add a fourth shade — a deep matte (espresso or black) pressed just along the lash line and outer corner over the existing dark shade, creating a gradient of three darks instead of two. Lower lash drama: extend the lower-lash smudge with a thin line of dark shadow or kohl along the outer half of the lower waterline, smudged soft — this is what separates “soft smoky” from “red carpet smoky.” Dimension: pat a shimmer or metallic shade onto the center of the lid over the matte base — the light-catching center makes eyes look bigger and adds the professional multi-dimensional finish.
The full version also demands the supporting cast: defined brows (a strong eye with invisible brows looks unbalanced), a touch more blush to keep the face from washing out under the eye drama, and the nude or muted lip that lets the eyes own the look. Build to it gradually — master the beginner brown smoky first, then add one advanced element per practice session. In three weeks of occasional practice, the “intimidating” look becomes just another Tuesday option.
Conclusion
The beginner smoky eye is five steps: prime, windshield-wiper transition shade, pat-and-blend dark on the outer V, smudge the lash lines, highlight and mascara. Start with browns, build in thin layers, blend until there are no edges, and do eyes before foundation. It’s a forgiving look by design — the blending hides every mistake, which is exactly why it’s the perfect first “advanced” technique. Your first attempt won’t be perfect; your fifth will be genuinely good.
Frequently Asked Questions
What’s the easiest smoky eye for beginners?
A brown/taupe smoky eye: transition shade in the crease, dark brown patted on the outer V and smudged along lashes, blended until seamless. Browns are forgiving; black is advanced.
How do I keep eyeshadow from creasing?
Eyeshadow primer is essential — it’s the difference between 3-hour and 10-hour wear. Set the primer lightly, avoid overly creamy shadows on oily lids, and don’t skip this step.
Why do I look like a raccoon when I do smoky eyes?
Usually: too much product too fast, no transition/blending layer, dark color brought too far inward, or skipping the lower lash line balance. Build slowly, blend constantly, keep darkness outer.
Should I do eyes or foundation first?
Eyes first — shadow fallout is inevitable for beginners, and cleaning it up ruins finished foundation. Do the full eye look, clean up, then do your base.
Can hooded eyes wear smoky eyeshadow?
Absolutely — place the transition shade above the natural crease where it’s visible with eyes open, keep lid color simple, and focus definition on the outer V and lash lines.