
How to Make Homemade Bread Without a Bread Machine
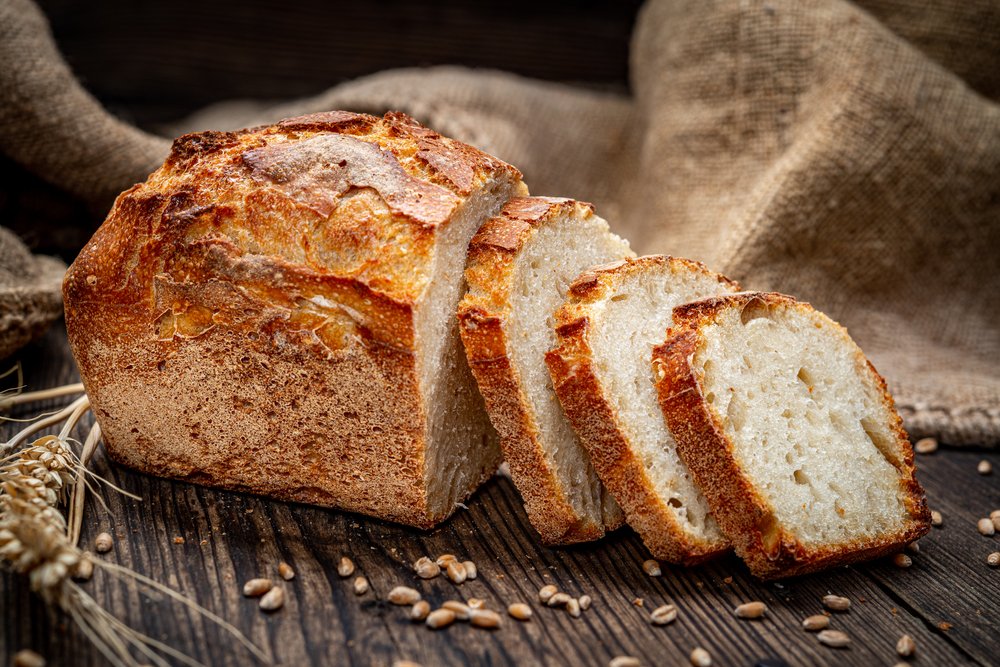
You do not need a bread machine to make homemade bread. You barely even need special equipment. A bowl, your hands, and an oven will get you a loaf that makes the whole house smell incredible and tastes better than most of what sits on grocery store shelves. I resisted bread-making for years because it looked technical and fussy. Then I tried a no-knead recipe on a lazy Sunday, and I have been baking bread most weekends since.
The real question is not whether you can make bread without a machine. It is which method fits your schedule, because bread is mostly waiting, not working.
How Can I Make Homemade Bread Without a Bread Machine?
There are three reliable paths, and all of them work with basic kitchen gear.
1. No-Knead Bread (Easiest, Best for Beginners)
This is the one to start with. Stir together three cups of flour, a quarter teaspoon of instant yeast, a teaspoon and a half of salt, and a cup and a half of lukewarm water until you have a shaggy dough. Cover the bowl and walk away for 12 to 18 hours. The long, slow ferment does the work that kneading normally does, developing flavor and structure while you sleep.
When you are ready to bake, shape the dough into a rough ball, let it rest 30 minutes, then bake it in a covered Dutch oven or any heavy oven-safe pot with a lid at 450°F. Thirty minutes covered, then 15 uncovered for a deep brown crust. That is the entire recipe, and the result is a crackly, open-crumbed loaf that looks like it came from a bakery.
2. Classic Kneaded Sandwich Loaf
If you want everyday sandwich bread, you will knead. Mix flour, yeast, salt, water, and a spoonful of honey or sugar plus a little oil or butter. Knead by hand for about eight to ten minutes until the dough is smooth and springs back when poked. Let it rise in a greased bowl until doubled, about an hour. Shape it into a log, place it in a greased loaf pan, let it rise again until crowned above the pan rim, and bake at 350°F for 30 to 35 minutes.
The windowpane test tells you the kneading is done: stretch a small piece of dough thin. If you can see light through it without it tearing, the gluten is developed enough.
3. Quick Breads (No Yeast at All)
Banana bread, soda bread, and beer bread use baking soda or baking powder instead of yeast, so there is no rise time at all. Irish soda bread, just flour, baking soda, salt, and buttermilk, goes from bowl to table in under an hour and is perfect when you want bread tonight, not tomorrow.
Equipment You Actually Need
- A large bowl. Anything big enough for dough to double works.
- A Dutch oven or heavy pot with a lid. For no-knead bread, trapped steam creates the crust. No Dutch oven? Bake on a sheet pan with a metal bowl inverted over the loaf for the first half of baking.
- A kitchen scale. Bread is far more consistent by weight than by cups.
- Instant yeast. It can be mixed straight into flour with no proofing step.
- A sharp knife or razor. For slashing the top so the loaf expands cleanly.
Troubleshooting Common Problems
Dense, heavy loaf? The most common cause is under-proofing or old yeast. Test your yeast by stirring a pinch into warm water with a little sugar; it should foam within ten minutes. And give the dough the full rise time, even if you are impatient.
Pale, soft crust? Your oven may run cool, or you pulled the loaf too early. Bread is done when the bottom sounds hollow when tapped, or when an instant-read thermometer reads 190 to 200°F in the center.
Dough will not rise at all? Check the room temperature. Yeast likes it cozy, around 75 to 80°F. An oven with just the light on is a perfect proofing box in a cold kitchen.
Going Further Once You Are Hooked
Once the basic loaf feels easy, the natural next step is sourdough. You can make your own sourdough starter from scratch with just flour and water, and it opens up a whole new flavor dimension. If anyone in the house eats gluten-free, it is also worth learning the best gluten-free flour alternatives for baking so nobody misses out on fresh bread day.
Easy Variations Once You Have the Basics
The basic dough is a template, not a finished product. Fold in a cup of shredded cheddar and diced jalapeños before shaping for a spicy cheese loaf. Swap a half cup of the water for honey and add cinnamon and raisins for a breakfast bread. Mix in olives, rosemary, and a glug of olive oil for something that tastes straight out of a Mediterranean bakery. Seeds and grains pressed onto the outside before baking add crunch and look impressive with zero skill required.
You can also play with flours. Replace up to a third of the white flour with whole wheat for a heartier loaf, or try bread flour instead of all-purpose for a chewier crumb. Just know that whole grains absorb more water, so add a splash extra and expect a slightly denser result.
Storing Homemade Bread So It Lasts
Homemade bread has no preservatives, so it stales faster than store-bought. The good news is that a crusty loaf keeps well at room temperature for two to three days if you store it cut-side down on a cutting board or in a paper bag. Plastic bags soften the crust, which is fine for sandwich loaves but sad for crusty ones. For longer storage, slice the whole loaf and freeze it in a zip-top bag; slices toast beautifully straight from frozen and taste nearly fresh-baked.
Whatever you do, do not refrigerate bread. The cold speeds up starch retrogradation, which is the scientific term for going stale. Room temperature or the freezer, nothing in between.
For step-by-step photos and baker’s percentages, King Arthur Baking is the gold standard free resource, and The Kitchn has excellent beginner troubleshooting guides.
My honest advice: start with no-knead this weekend. Mix the dough Saturday night, bake Sunday morning, and try to tell me the smell alone was not worth it. Bread without a machine is not a compromise. For most home bakers, it is actually the better bread.




1 thought on “How to Make Homemade Bread Without a Bread Machine”