
How to Grow Garlic at Home Step by Step: Beginner’s Guide
Garlic is the rare crop that’s simultaneously one of the easiest vegetables to grow and one of the most satisfying — plant a clove in fall, ignore it all winter, harvest a bulb in summer that puts store-bought garlic to shame. Homegrown garlic tastes more complex, keeps for months, and costs pennies per bulb. If you’ve never grown anything from a clove, garlic is the perfect first triumph.
This step-by-step guide covers everything: choosing the right garlic type, preparing your planting spot, the fall planting ritual, winter and spring care, knowing exactly when to harvest, and curing your bulbs for long storage.
Step 1: Choose the Right Garlic Type
Garlic comes in two main families, and the choice matters enormously. Hardneck garlic produces a flowering stalk (the delicious “scape”), has fewer but larger cloves, offers more complex flavors, and needs cold winters to bulb properly — it’s the choice for northern and midwestern states. Softneck garlic doesn’t produce scapes, stores longer, braids beautifully, and tolerates milder winters — the choice for southern states and the type most grocery garlic belongs to.
Buy seed garlic from a garden supplier, not the grocery store — supermarket garlic is often treated with sprout inhibitors and may carry disease, plus it’s usually a softneck variety unsuited to cold climates. One pound of seed garlic plants roughly a 4×8-foot bed and yields 30–40 bulbs. A simple raised bed is ideal for garlic: excellent drainage (garlic hates wet feet) and easy soil control.
Step 2: Prepare the Planting Site
Garlic demands full sun — six-plus hours daily — and rich, well-draining soil. Work 2–3 inches of compost into the top 6–8 inches of soil, and check drainage: dig a hole, fill it with water, and confirm it drains within a few hours. In heavy clay, raised beds or mounded rows aren’t optional — they’re the difference between bulbs and mush.
Garlic is a hungry feeder that appreciates fertile soil but hates fresh manure (which can burn and introduce disease). Aim for slightly acidic to neutral pH. The USDA’s cooperative extension resources at usda.gov can connect you with your state’s extension service for soil testing — a $15 test that prevents a season of guessing.
Step 3: Plant in Fall (Timing Is Everything)
Garlic is planted in fall, 4–6 weeks before the ground freezes — typically October-November in most of the U.S. The cloves establish roots before winter, go dormant in the cold (which hardneck types require to form bulbs), then explode upward in spring.
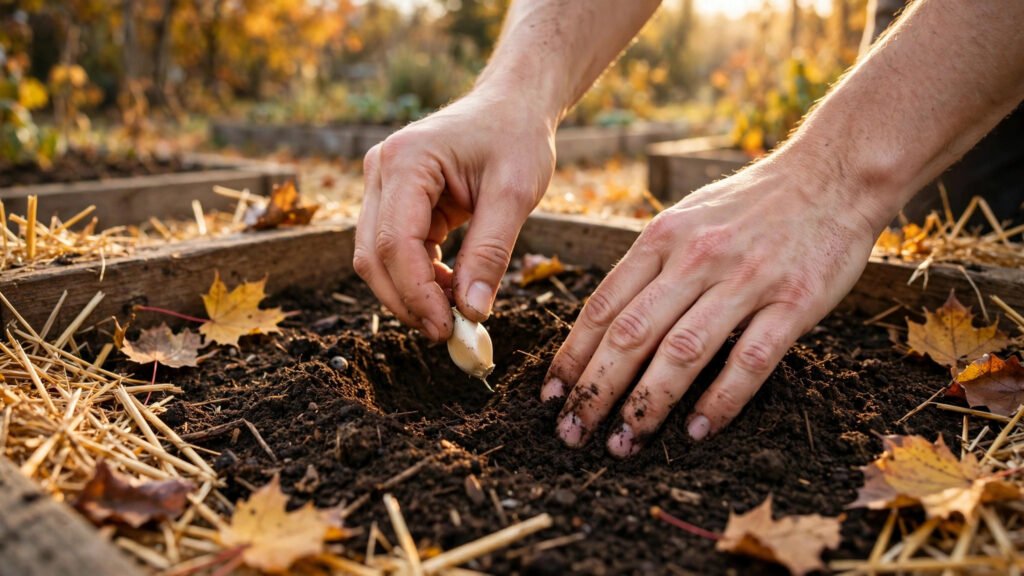
Break bulbs into individual cloves the day before planting (not earlier — exposed cloves dry out), keeping the papery skins intact. Plant each clove pointed-end up, 2 inches deep and 4–6 inches apart, in rows 6–8 inches apart. The pointed/up orientation matters — upside-down cloves still grow but produce deformed bulbs. Water well after planting, then mulch heavily with 4–6 inches of straw or shredded leaves. The mulch insulates against freeze-thaw cycles that heave cloves out of the ground — the number-one killer of fall plantings.
Step 4: Winter and Spring Care
Winter: do nothing. Seriously — the mulch and cold are doing the work. Resist the urge to dig up a clove “to check.” In spring, green shoots emerge as soon as soil warms. Pull back excess mulch gradually as growth starts, leaving a thin layer for weed suppression.
Spring care is simple but important: water consistently (about an inch weekly — garlic needs steady moisture during bulb formation in late spring), weed diligently (garlic competes poorly — weeds steal the water and nutrients your bulbs need), and feed once with a balanced fertilizer or side-dressing of compost when shoots are 6 inches tall. If you planted hardneck, harvest the curly scapes when they make one full loop — they’re a delicacy (pesto, stir-fries, grilling), and removing them redirects energy into bigger bulbs. Even small-space gardeners can grow garlic in deep containers — a 12-inch pot fits 4–6 cloves.
Step 5: Harvest at Exactly the Right Moment
Timing the harvest is the skill that separates great garlic from mediocre. Harvest too early: small, underdeveloped bulbs. Too late: the protective wrappers disintegrate underground and bulbs fall apart in storage. The signal: when the lower 2–3 leaves have browned but 5–6 green leaves remain (each green leaf corresponds to a protective wrapper layer around the bulb).
Typically late June to July depending on climate. Loosen soil with a fork (don’t pull by the stalk — you’ll snap it), lift gently, and shake off loose soil without washing. Harvest on a dry day if possible; wet harvests invite disease during curing.
Step 6: Cure for Long Storage
Fresh garlic must cure 2–4 weeks in a warm, dry, well-ventilated spot out of direct sun — a covered porch, garage, or barn works. Lay bulbs in a single layer or hang in bunches; good airflow prevents mold. After curing, trim roots, cut stalks (or braid softnecks), and brush off outer dirt — don’t wash.
Properly cured garlic stores 6–8 months (softnecks longer than hardnecks) in a cool, dark, ventilated spot — a pantry or basement around 60°F with airflow. Never refrigerate (cold triggers sprouting) and never store in plastic (trapped moisture causes rot). Set aside your biggest, healthiest bulbs as next year’s seed garlic — selecting for size year after year quietly breeds a strain adapted to your exact garden. Homegrown garlic that stores for months is also one of the simplest ways to cut kitchen waste — you’ll never throw away another sprouted grocery-store bulb.
Troubleshooting Common Problems
Small bulbs: usually planted too late, harvested too early, or crowded — give cloves their full spacing and full season. Yellow leaves in spring: often nitrogen deficiency (feed) or waterlogging (improve drainage). No bulb formation: wrong type for your climate (softneck in the far north often fails to bulb without sufficient cold) or planted in spring instead of fall. Pests: garlic is remarkably pest-resistant — its sulfur compounds repel most insects — which is one more reason it’s the ideal beginner crop.
The USDA’s Plant Hardiness Zone Map helps you confirm which garlic types will thrive through your winters.
Conclusion
Growing garlic at home is six steps spread across eight months, most of them blissfully passive: choose the right type for your climate, prepare sunny well-drained soil, plant cloves in fall, mulch and ignore through winter, tend lightly in spring, harvest when lower leaves brown, and cure for storage. Your first harvest — pulling fat, fragrant bulbs from soil you prepared yourself — will ruin store-bought garlic forever. Plant this fall; thank yourself next summer.
Frequently Asked Questions
Can I grow garlic from grocery store cloves?
It’s possible but unreliable — grocery garlic is often treated with sprout inhibitors, may carry disease, and is usually a variety unsuited to your climate. Seed garlic from garden suppliers costs little and performs dramatically better.
How much garlic do I get from one clove?
Each planted clove grows into one full bulb containing 4–12+ cloves depending on variety. One pound of seed garlic (roughly 40–50 cloves) typically yields 30–40 bulbs — a 6-to-8-fold multiplication.
Can I grow garlic in containers?
Yes — use containers at least 12 inches deep with drainage holes, plant cloves 4–6 inches apart, and use quality potting mix. Container garlic needs more consistent watering than in-ground plantings but otherwise follows the same steps.
Why did my garlic produce only one big clove (a “round”)?
Usually from planting too late in spring instead of fall, or from a variety unsuited to your winter. The good news: replant rounds in fall and they’ll typically form full bulbs the following year.
How long does homegrown garlic last in storage?
Properly cured and stored (cool, dark, ventilated, never refrigerated), softneck garlic lasts 8+ months and hardneck 4–6 months. Set aside the best bulbs for replanting and you’ll never buy seed garlic again.