What Is the Best Way to Organize a Garage
Every garage I’ve ever owned has followed the same trajectory: pristine on move-in day, then a slow descent into chaos — boxes stacked everywhere, tools buried, the car eventually exiled to the driveway. A disorganized garage isn’t just ugly; it’s expensive. You buy duplicates of tools you can’t find, projects stall because setup takes an hour, and the space you pay a mortgage on goes to waste.
Organizing a garage isn’t about buying a bunch of matching bins (though that helps). It’s about zones, vertical space, and ruthless purging. Here’s the system that actually works.
What Is the Best Way to Organize a Garage?
The best approach follows four phases in order: purge, zone, go vertical, and contain. Skip the purge and you’re just organizing junk more neatly. Do them in sequence and the garage practically organizes itself.
Phase 1: Purge Ruthlessly
Pull everything out — yes, everything — onto the driveway. It’s the only way to see what you actually have. Then sort into four piles: keep, donate/sell, trash, relocate (things that belong elsewhere in the house). Be brutal: if you haven’t used it in two years and it has no sentimental value, it goes. Broken tools you’ll “fix someday,” dried-out paint cans, mystery boxes from three moves ago — out.
Hazardous materials (old paint, chemicals, batteries) can’t go in regular trash — take them to your municipality’s hazardous waste drop-off. Most hold free collection events a few times a year. This purge typically eliminates 30–40 percent of garage contents, which is like gaining a third more garage for free.
Phase 2: Create Zones
Divide the garage into functional zones based on how you use it. Common zones:
- Tool and workshop zone: workbench, pegboard, tool storage — ideally near an outlet and good lighting.
- Garden and yard zone: near the garage door for easy in-out access. Rakes, shovels, mower, pots, soil.
- Sports and recreation zone: bikes, balls, camping gear. Wall-mounted bike racks free enormous floor space.
- Automotive zone: car supplies, emergency kit, cleaning products — near where the car parks.
- Storage zone: seasonal items, holiday decorations, rarely-used stuff — the least accessible area (high shelves, back corners).
- Trash and recycling: near the door to the house or the garage door, wherever the trip outside is shortest.
Everything gets a zone. If something doesn’t fit a zone, question whether it belongs in the garage at all.
Phase 3: Go Vertical — The Walls and Ceiling Are Free Real Estate
The floor is the most valuable surface in a garage; the walls and ceiling are free. Use them aggressively:
- Pegboard ($20–$40 per 4×8 sheet) above the workbench for hand tools — visible, accessible, and satisfying.
- Slatwall panels or track systems (like Gladiator or Rubbermaid FastTrack, $100–$300 for a starter setup) with hooks for everything from bikes to ladders to extension cords.
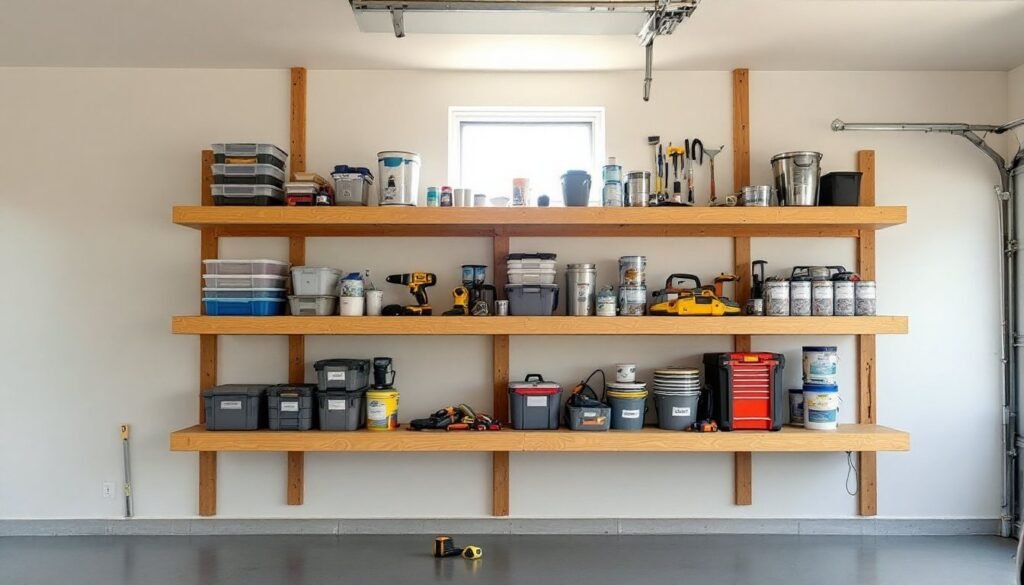
- Wall-mounted shelving: sturdy brackets with 2×4 or plywood shelves hold hundreds of pounds for a fraction of freestanding shelving cost.
- Ceiling-mounted racks ($50–$100 each) for seasonal items — holiday decorations, camping gear, rarely-used bins. They hold 250+ pounds and use completely dead space.
- Magnetic strips for drill bits, wrenches, and small metal tools — $10 and endlessly useful.
Keep frequently used items between knee and shoulder height. Seasonal and rarely-used items go high; heavy items go low. Nothing you use weekly should require a ladder.
Phase 4: Contain What’s Left
Now — and only now — buy storage containers. Clear bins beat opaque ones because you can see contents without opening them. Standardize on one or two sizes so they stack neatly. Label everything with a label maker or painter’s tape and marker — “unlabeled bin” is just a box of mystery you’ll never open.
For small parts (screws, nails, bolts), a parts organizer with small drawers ($20–$30) beats coffee cans. For chemicals and paints, a flammable storage cabinet or at minimum a dedicated shelf away from ignition sources. Keep a small trash can in the garage — you’ll use it constantly during projects.
Maintaining the System
Organization decays without maintenance. Two habits preserve it: everything gets put back after use (the five-minute rule — if putting it away takes less than five minutes, do it now), and a twice-yearly 30-minute reset where you walk through and return strays to their zones. Label the zones themselves if multiple family members use the garage — a label that says “camping gear” prevents the slow migration of random boxes.
If your tools have outgrown the garage entirely, our guide to storing tools in a small shed covers the overflow strategy. And if the garage needs weather-sealing as part of the overhaul, see weatherproofing for winter — the same principles apply to garage doors and windows.
Budget Breakdown
A solid garage organization costs far less than people expect: pegboard and hooks ($50), a track wall system ($150–$250), ceiling racks ($100 for two), clear bins ($60–$100 for a dozen), labels ($15), and bike hooks ($30). Total: $400–$600 for a complete transformation. You can halve that by building shelves from 2x4s and plywood instead of buying systems. The purge, of course, is free — and it’s the most impactful step.
The Floor: Don’t Neglect It
Once everything’s off the floor, consider the floor itself. Bare concrete stains, dusts, and looks unfinished. Epoxy floor coating ($100–$200 in materials for a DIY kit) creates a durable, chemical-resistant, great-looking surface that makes the whole garage feel like a real room — and makes spills wipe up instead of soaking in. Prep is everything: the concrete must be clean, dry, and etched for adhesion. Alternatively, interlocking garage floor tiles ($200–$400 for a two-car garage) install in an afternoon with no curing time and can be replaced individually if damaged. Either option transforms the space dramatically and protects the concrete underneath.
Practical Takeaway
Purge everything first, divide the space into zones by use, move storage to walls and ceiling to free the floor, contain the rest in labeled clear bins, and maintain with a five-minute put-back rule. An organized garage isn’t about perfection — it’s about being able to find what you need, park where you should, and actually use the space you’re paying for. One weekend of work pays off every single day after. Family Handyman’s garage organization projects have build plans for the wall systems described above.