How Can I Fix Squeaky Hardwood Floors
Squeaky hardwood floors have a special talent for announcing your presence. Every midnight trip to the kitchen becomes a creaking soundtrack; every step in the hallway telegraphs through the house. My old colonial had floors so talkative I could identify which family member was walking by the squeak pattern. The good news: most squeaks are fixable without tearing up the floor, and many fixes take minutes.
Here’s how to fix squeaky hardwood floors, from the five-minute tricks to the proper structural repairs.
How Can I Fix Squeaky Hardwood Floors?
First, understand what’s actually squeaking. Wood rubbing against wood — a loose board moving against a neighboring board or against the subfloor — causes almost all squeaks. The fix is always some version of the same thing: stop the movement. Everything below is a different way to accomplish that, depending on whether you can access the floor from below.
Quick Fixes: No Tools Required (or Barely Any)
Try these first — they solve a surprising number of squeaks:
- Powdered graphite or talcum powder: Work the powder into the seams around the squeaky board with a cloth or old toothbrush, then walk over it to work it deeper. The powder lubricates the wood-on-wood contact and often silences the squeak immediately. Cheap, fast, and surprisingly effective for minor squeaks between boards.
- WD-40 or silicone lubricant: Spray into the seam, wipe excess, walk on it. Works on the same principle as powder. Use silicone-based rather than oil-based to avoid staining.
- Humidity control: Floors squeak more in dry winter months when wood shrinks and gaps open. Running a humidifier to keep indoor humidity at 35–55 percent can quiet seasonal squeaks without any repair at all.
Fixes From Above (When You Can’t Access Below)
Most squeaks need to be fixed from the finished-floor side. The pro method:
- Breakaway screws (squeak-reduction kits): Products like the Squeeeeek No More kit ($25–$35) are designed exactly for this. You drive a scored screw through the floor into the joist or subfloor using the included jig, then the screw head snaps off below the surface, leaving a tiny hole you fill with wood filler. Locate the joist first with a stud finder, pre-drill, and drive screws every 6–8 inches along the squeaky area. This is the most reliable above-floor fix.
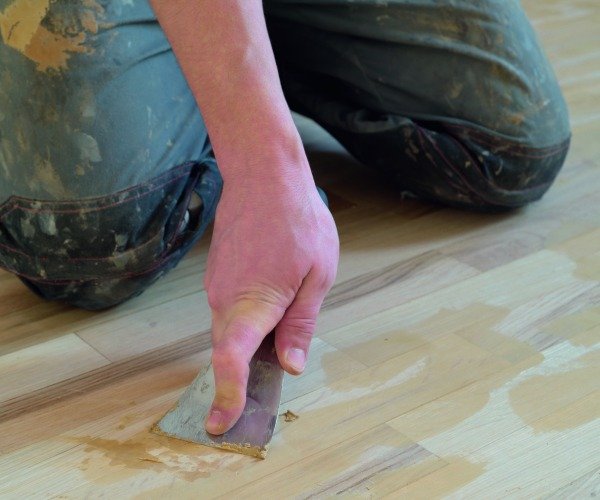
- Trim screws and wood filler: The DIY version — drill a pilot hole, drive a trim-head screw through the floor into the joist, countersink slightly, and fill with matching wood filler. Works well; just be careful about screw placement so you don’t split the board.
- Construction adhesive injection: For squeaks between the hardwood and subfloor (rather than at joists), drilling a small hole and injecting flexible construction adhesive, then weighing the board down overnight, can bond the layers silently.
Finding the squeak precisely is half the battle. Have someone walk slowly while you listen from below (if accessible) or mark the exact spot from above with painter’s tape. Squeaks often come from a slightly different spot than where your ear places them — verify by pressing down on specific boards.
Fixes From Below (Best Method When Accessible)
If you have an unfinished basement or crawl space under the squeaky floor, you have the best options:
- Shims: Have someone walk above while you watch from below. When you see movement between the subfloor and joist, tap a glue-coated wood shim into the gap — snug, not forced (forcing can raise the floor and create new squeaks). This is the classic, most effective fix.
- Sister blocking: For persistent squeaks, screw a 2×4 block alongside the joist, tight against the subfloor, bridging the gap. Rock solid.
- Construction adhesive: Run a bead of subfloor adhesive along the joist-subfloor joint to bond them permanently.
- Screws from below: Drive short screws up through the subfloor into the hardwood — careful with length; measure the total floor thickness and use screws that stop well short of the finished surface.
When Squeaks Signal Bigger Problems
Most squeaks are just annoying, but some indicate structural issues. Investigate further if: the floor feels bouncy or spongy (possible joist damage or undersized joists), squeaks appeared suddenly across a large area (possible water damage or foundation movement), or you see visible sagging. These warrant a professional inspection — a structural engineer ($300–$500) for suspected framing issues, not just a flooring contractor.
Also check for water damage under squeaky areas, especially near bathrooms, kitchens, and exterior walls. Soft, discolored, or musty-smelling wood needs addressing at the source before any squeak fix will hold.
Prevention for the Future
If you’re installing new hardwood or refinishing existing floors, prevent squeaks proactively: ensure the subfloor is flat, clean, and properly screwed down (not just nailed — nails work loose over time), use construction adhesive between subfloor and joists, acclimate the hardwood to the home’s humidity before installation, and maintain consistent indoor humidity year-round. Our guide to refinishing hardwood floors yourself covers the full restoration process, and the best flooring for homes with dogs addresses durability if pets are part of the equation.
Squeaks in Laminate and Engineered Floors
Floating floors (laminate, LVP, engineered click-lock) squeak for different reasons than nail-down hardwood — usually an uneven subfloor causing the planks to flex, or insufficient expansion gap making planks bind against walls. The powder trick rarely helps here. Check that expansion gaps exist around the perimeter (baseboards hide them — peek underneath). For subfloor unevenness, the real fix is pulling up the affected planks and leveling the subfloor with patching compound, which is more work but permanent. If a floating floor squeaks everywhere, the underlayment may be inadequate — a denser acoustic underlayment during the next replacement solves it. Our guide to installing laminate flooring over tile covers proper subfloor prep that prevents these issues from the start.
Practical Takeaway
Start with powder or lubricant in the seams and humidity control — the five-minute fixes. For persistent squeaks, use breakaway screws from above or shims and blocking from below to stop the movement causing the noise. Investigate bouncy floors or sudden widespread squeaking for structural or water issues. Most squeaks are a weekend project, not a flooring replacement — silence is closer than you think. This Old House’s flooring repair videos demonstrate the shim technique clearly if you’re a visual learner.