What Are the Best Energy-efficient Upgrades for an Older Home
Older homes have soul — plaster walls, real wood trim, proportions you can’t buy anymore. They also have soul-crushing utility bills. My 1960s ranch was charming and drafty in equal measure; the first winter’s heating bill made me seriously consider moving. Instead, I went after the energy leaks systematically, and cut my energy costs by nearly a third without changing how the house looks or feels.
Here are the best energy-efficient upgrades for an older home, ranked by bang for buck — because not all efficiency spending is equal.
What Are the Best Energy-Efficient Upgrades for an Older Home?
The golden rule of efficiency upgrades: seal and insulate before you upgrade equipment. A high-efficiency furnace heating a leaky house is like pouring premium gas into a car with a hole in the tank. The building envelope comes first, always.
1. Air Sealing — The Highest ROI Upgrade
Most older homes leak air like sieves — around windows, doors, plumbing penetrations, attic hatches, and where walls meet the foundation. A DIY air-sealing weekend with caulk, weatherstripping, and spray foam ($100–$300 in materials) can cut heating and cooling costs by 10–20 percent. It’s unglamorous, invisible work with the best return of any efficiency project.
Target the big leaks first: the attic hatch or pull-down stairs (often the single leakiest spot in the house — an insulated hatch cover costs $50–$100), gaps around plumbing and wiring penetrations in the attic floor, and weatherstripping on exterior doors. A blower-door test ($300–$500, often subsidized by utilities) quantifies your leaks and tells you exactly where they are. Many utility companies offer free or discounted home energy audits — check before spending anything.
2. Attic Insulation — The Second-Highest ROI
Heat rises, and in older homes it rises straight through under-insulated attics. If you can see your ceiling joists in the attic, you need more insulation — the Department of Energy recommends R-38 to R-60 in attics (roughly 12–18 inches of blown cellulose or fiberglass). Blowing in additional insulation costs $1,500–$3,000 for a typical home and pays back in 2–4 years through lower bills.
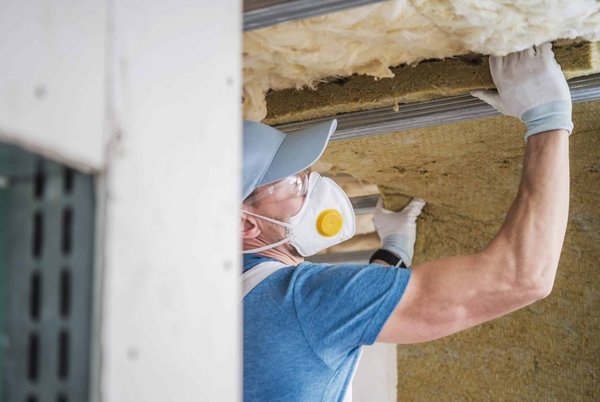
This is very DIY-able: home centers rent blower machines free with insulation purchase, and two people can do an attic in a day. Wear full protective gear — respirator, goggles, long sleeves — because blown insulation is miserable to breathe. If your home might have vermiculite insulation (common pre-1990, potentially containing asbestos), don’t disturb it — get it tested first. Our guide to knowing if your home needs new insulation helps you assess the whole house.
3. Smart Thermostat — $150–$250, Pays for Itself in a Year
A smart thermostat (Nest, Ecobee, or similar) learns your schedule, adjusts automatically, and lets you control heating remotely. The EPA estimates they save about 8 percent on heating and cooling — roughly $50–$100/year for most homes, meaning payback in 1–2 years. Installation is a 30-minute DIY job for most systems (check compatibility with your HVAC first, especially if you have a heat pump or multi-stage system).
4. LED Lighting — The Cheapest Win
If you still have incandescent or CFL bulbs, swap them all for LEDs. LEDs use 75 percent less energy, last 25 times longer, and cost $2–$5 per bulb now. A whole-house swap runs $50–$150 and starts saving immediately. It’s the rare upgrade that’s cheaper, better, and easier than what it replaces.
5. Water Heating Efficiency
Water heating is typically the second-largest energy expense in a home. Cheap wins: turn the water heater down to 120°F (most are set to 140°F unnecessarily), insulate the tank with a $30 blanket (for older tanks), and insulate the first six feet of hot water pipes. Bigger win: when the old tank dies, replace it with a heat pump water heater — 2–3x more efficient than conventional electric, with federal tax credits often covering a big chunk of the cost.
6. Windows: Repair Before Replacing
Here’s the contrarian take: full window replacement has terrible ROI — $10,000–$20,000 for 5–15 percent energy savings, with payback periods of 20+ years. Before replacing, try: interior storm windows ($100–$300 per window, nearly as effective as replacement), window film for summer heat gain, cellular shades (which add real insulation value), and thorough weatherstripping and caulking. Replace windows only when they’re failing structurally — rotted frames, broken seals, inoperable sashes — not purely for efficiency.
For winter-specific window work, see our guide to weatherproofing windows for winter.
7. HVAC: Maintain, Then Upgrade Strategically
An old furnace or AC running inefficiently wastes money every day. Annual maintenance (clean filters monthly, professional tune-up yearly) keeps whatever you have running at its best. When replacement time comes, heat pumps are the efficiency story of the decade — modern cold-climate heat pumps work efficiently well below freezing and handle both heating and cooling, often cutting HVAC energy use by 50 percent versus old furnaces or baseboard heat.
Right-size the system: oversized HVAC short-cycles, wasting energy and wearing out faster. A proper Manual J load calculation (not a rule of thumb) determines the right size — insist on it from any contractor.
8. Take Advantage of Incentives
Don’t leave money on the table. The federal Inflation Reduction Act provides tax credits up to 30 percent for heat pumps, insulation, windows, and other efficiency upgrades, plus rebates for lower-income households. Many states and utilities layer additional rebates on top — sometimes covering 50 percent or more of project costs. Check the ENERGY STAR rebate finder and your utility’s website before starting any project.
Don’t Ignore the Basement and Ductwork
Two often-overlooked efficiency drains: leaky ductwork and uninsulated basement walls. Ducts running through unconditioned attics or crawl spaces can lose 20–30 percent of heated or cooled air through leaks — sealing them with mastic (not duct tape, ironically) is a $200–$500 job with fast payback. And insulating basement walls (rather than the ceiling above) brings the basement into the thermal envelope, warming the floors above noticeably. Rigid foam board against the walls is the standard approach. Neither project is glamorous, but both punch above their weight.
Practical Takeaway
Start with air sealing and attic insulation — the two highest-ROI projects — then add a smart thermostat, LED bulbs, and water heater tweaks for quick wins. Repair windows before replacing them, maintain your HVAC, and go heat pump when replacement time comes. Layer federal tax credits and utility rebates over everything. Do it in this order and you’ll cut energy bills 25–40 percent while making the house more comfortable in every season.