How Do I Refinish Hardwood Floors Myself
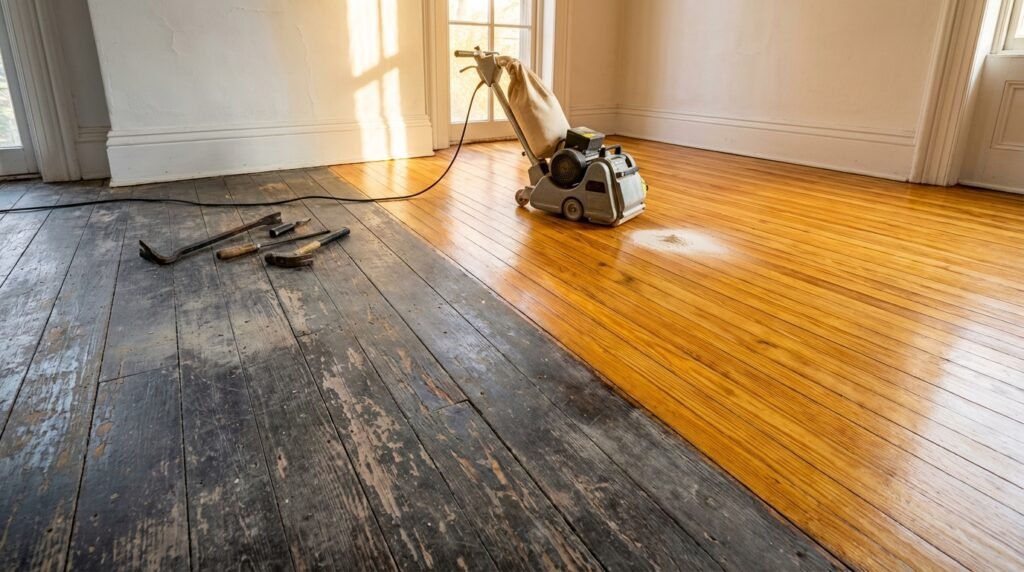
Refinishing hardwood floors is the most dramatic transformation in home improvement. Worn, scratched, dull floors become rich, glowing, like-new surfaces — and the cost is a fraction of replacement. I refinished the oak floors in my living room and hallway myself, and the before-and-after was so striking that visitors assumed I’d installed new flooring. It took a long weekend, about $300 in rentals and materials, and a willingness to embrace the dust.
Here’s how to refinish hardwood floors yourself, with the mistakes to avoid that I learned the hard way.
How Do I Refinish Hardwood Floors Myself?
First, determine whether your floors can be refinished. Solid hardwood can be sanded and refinished many times. Engineered hardwood can be refinished only if the veneer layer is thick enough (3mm+ ideally — check manufacturer specs; thin veneers can’t survive sanding). Laminate and LVP cannot be refinished at all. If you’re unsure what you have, pull up a floor vent or threshold to see the cross-section.
Also assess: floors with deep stains, pet damage through the finish, or extensive gaps may need board replacement in spots before refinishing. And if the floors have been sanded many times already (check thickness at a vent), they may be too thin for another round — a flooring pro can advise.
Screen and Recoat vs. Full Sanding
Not every floor needs full sanding. If the finish is worn and dull but the wood isn’t damaged — no deep scratches, stains, or bare spots — a screen and recoat (lightly abrading the existing finish and applying new topcoat) takes half a day and costs under $100. It’s dramatically easier than sanding. Only do a full sand-down when the finish is gone in areas, stains penetrate the wood, or you want to change the color.
Tools and Materials
- Drum or orbital floor sander rental ($60–$80/day): drum sanders are aggressive and fast but can gouge if you hesitate — random orbital floor sanders are slower but far more beginner-friendly. For first-timers, I strongly recommend the orbital.
- Edge sander rental ($40–$50/day): for perimeters where the big sander can’t reach.
- Sandpaper in 36/60/80/100 grit for drum sanding (or 40/60/80/100/120 for orbital) — buy more than you think; clogged paper is useless.
- Finish: water-based polyurethane (low odor, fast drying, doesn’t amber) or oil-based (richer color, longer dry time, stronger fumes). Water-based is the DIY-friendly choice — $50–$80 per gallon, 3–4 coats.
- Stain (optional, if changing color) — $10–$15 per quart.
- Safety gear: respirator (not a dust mask — a real respirator, $25–$35), goggles, ear protection, knee pads.
- Painter’s tape, plastic sheeting (seal off the work area — dust goes everywhere), tack cloths, mineral spirits.
The Process, Step by Step
1. Prep the Room (Half Day)
Remove all furniture, quarter-round molding (label pieces for reinstallation), and floor vents. Set protruding nails with a nail set — the sander will catch them otherwise. Seal doorways with plastic sheeting; close HVAC vents in the work area. Clean the floor thoroughly.
2. Sand (1–2 Days)
Start with the coarsest grit needed — 36 grit for floors in rough shape, 60 if they’re decent. The rule: keep the sander moving at all times when it’s on the floor. Stopping in one spot creates a divot you’ll see forever. Sand with the grain, overlapping passes by half the sander width.
Progress through grits: 36 → 60 → 80 → 100 (skip no more than one grit size between steps — each grit removes the scratches of the previous one). Use the edge sander with the same grit progression along walls. Between the final grits, the floor should feel uniformly smooth with no visible scratches or shiny spots (shiny = old finish remaining).
Vacuum thoroughly between grits and after the final sand. Then tack with mineral spirits (for oil-based finish) or a damp (not wet) microfiber (for water-based) to remove every speck of dust. Dust in the finish is the difference between professional and amateur results.
3. Stain (Optional, Half Day)
If changing color, apply stain with a rag or applicator, working in manageable sections and wiping excess consistently — uneven wiping creates uneven color. Let it dry fully per the can (usually 8–24 hours). Test your stain on a closet floor or under where furniture sits first; stain looks different on your actual floor than on the sample.
4. Finish (2–3 Days)
Apply thin, even coats of polyurethane with a lambswool applicator, T-bar, or high-quality brush — never a roller (it creates bubbles). Maintain a wet edge, work with the grain, and don’t overwork the finish. Lightly screen-sand (220 grit) between coats after full drying, then vacuum and tack again — this mechanical bond between coats is essential.
Apply 3 coats minimum (4 for high-traffic areas). Water-based poly dries in 2–4 hours between coats; oil-based needs 8–24 hours. Stay off the floor for 24 hours after the final coat, no furniture for 3–7 days, no rugs for 2–4 weeks (they trap curing gases and can imprint). Full cure takes about 30 days — treat the floor gently during this time.
Common Disasters and How to Avoid Them
- Drum sander divots: from stopping or tilting the running sander. Keep it moving, keep it flat. When in doubt, use the orbital.
- Chatter marks: wavy lines from a poorly maintained rental drum. Test on a closet first; if the rental chatters, exchange it.
- Dust in the finish: from inadequate vacuuming/tacking between coats. Be obsessive about dust removal.
- Bubbles in water-based poly: from shaking the can or overworking. Stir gently, apply smoothly, don’t go back over it.
- Stain blotching: from uneven prep or skipping wood conditioner on soft woods (pine, maple). Use pre-stain conditioner on blotch-prone species.
Cost Comparison
DIY: $250–$400 (rentals, sandpaper, finish, safety gear) for an average room. Professional: $3–$5 per square foot ($1,500–$2,500 for 500 sq ft). The savings are enormous — but so is the labor. If the floors are in good shape and just dull, remember the screen-and-recoat option: under $100 and a single day, DIY or $1–$2/sq ft professionally.
For ongoing floor care after refinishing, see our guide to fixing squeaky floors (address movement before refinishing, ideally) and flooring for homes with dogs if pets will be hard on the new finish. For product guidance, This Old House has excellent floor-finishing tutorials.
Practical Takeaway
Confirm your floors can be refinished, consider screen-and-recoat for lightly worn floors, rent an orbital sander (beginner-friendly), progress through grits without skipping, obsess over dust removal between coats, apply 3+ thin coats of finish, and respect the cure times. It’s dusty, physical work — but for $300 and a long weekend, there’s no home improvement with a more dramatic before-and-after.