How Do I Replace a Broken Window Screen
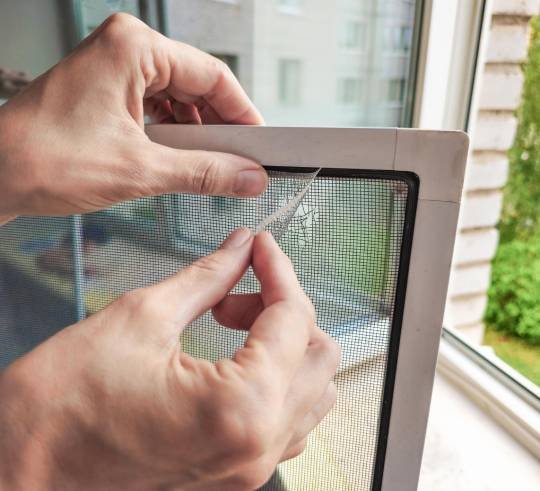
A torn window screen is one of those small annoyances that punches above its weight — the bugs get in, the breeze doesn’t flow right, and it makes the whole window look neglected. The good news: replacing a window screen is a genuinely easy DIY project. It takes about 20–30 minutes, costs under $20 in materials, and requires exactly one specialty tool. I’ve rescreened a dozen windows now, and the first one took me 25 minutes; the rest took 15.
Here’s how to replace a broken window screen, whether you’re patching a small tear or rescreening the whole frame.
How Do I Replace a Broken Window Screen?
First, decide: repair or replace? A small tear (under 3 inches) in an otherwise good screen can be patched with a screen repair patch kit ($5–$8) — adhesive mesh patches that you trim to size and stick on. They’re not beautiful, but they’re functional and take two minutes. For larger tears, brittle or faded screening, bent frames, or multiple damaged screens, full rescreening is the better move — it’s cheap and the result looks brand new.
Tools and Materials
- Replacement screen mesh: fiberglass is standard (cheap, flexible, easy to work with — about $8–$12 for a 36″x84″ roll, enough for several windows). Aluminum is stronger and more durable but harder to install and dents. Pet-resistant screen (vinyl-coated polyester) is worth the premium ($15–$25 per roll) if you have cats or dogs that push on screens.
- Spline: the rubber cord that holds the screen in the frame’s groove. Buy new spline — old spline is compressed and won’t hold. It comes in diameters from 0.125″ to 0.25″; match the original size (bring a piece to the store). A 25-foot roll costs $5–$8.
- Spline roller: the one specialty tool — a $5–$8 double-wheeled tool that presses spline into the groove. Don’t try to substitute a screwdriver; you’ll tear the mesh.
- Utility knife with a sharp blade, flathead screwdriver, scissors, and tape measure.
Step 1: Remove the Screen Frame
Most window screens remove easily: lift the frame up into the top track, then pull the bottom toward you and out. Some have spring-loaded plungers on the sides — push them in while lifting. Others have small clips or latches. If the screen hasn’t been removed in years, it may stick — work it gently rather than forcing it. Note which window each screen came from if you’re doing several (a piece of painter’s tape with the room name saves confusion).
Step 2: Remove the Old Screen and Spline
Lay the frame on a flat work surface. Use a flathead screwdriver or awl to pry up one end of the spline from its groove, then pull the entire spline out — the old screen comes with it. Discard both. Clean the groove thoroughly with a brush or rag; dirt and debris in the groove prevent the new spline from seating properly.
Inspect the frame: if it’s bent, straighten it gently. If corners are broken, replacement corner inserts ($3–$5 for a pack) slide in easily. If the frame itself is badly bent or corroded, buy a replacement frame kit ($10–$15) — aluminum frame stock that you cut to size with a hacksaw and join with corners. It’s barely more work than rescreening.
Step 3: Install the New Screen
Lay the frame flat and cut the new mesh 2 inches larger than the frame on all sides — you’ll trim the excess later. Lay the mesh over the frame, keeping the weave straight (crooked mesh looks terrible).
Starting at one corner, use the convex wheel of the spline roller to press the mesh into the groove along one side. Then lay the new spline over the mesh in the groove and use the concave wheel to roll the spline in firmly, which locks the mesh in place. Work around the frame, keeping the mesh taut but not drum-tight — over-tensioning bows the frame inward. At corners, make a neat fold or cut a small relief slit so the mesh lies flat.
Go slowly on your first one. The technique clicks after the first side — by the second window you’ll feel like a pro.
Step 4: Trim and Reinstall
With the spline fully seated, trim the excess mesh with a sharp utility knife, running the blade along the outside edge of the spline groove. Use a fresh blade and steady pressure — a dull blade drags and tears. Angle the blade slightly outward so you don’t cut the spline.
Reinstall the frame in the window (reverse of removal). Check that it sits flat and the edges seal — gaps around the frame let bugs in just as surely as a torn screen.
Choosing the Right Screen Mesh
Beyond standard fiberglass, consider your needs: pet-resistant screen (7x stronger than standard fiberglass) if animals push against screens; solar/insect screen (denser weave) if you want UV and heat reduction plus bug protection — it noticeably cools sunny rooms but slightly dims the view; aluminum screen for maximum durability in high-traffic or commercial settings. Standard charcoal fiberglass suits most homes — it’s the best balance of visibility, airflow, durability, and price.
Maintenance Tips
Screens last 10–15 years with basic care. Clean them annually with a soft brush or vacuum with a brush attachment, then wipe with a damp cloth — dirt buildup restricts airflow and looks dingy. Remove and store screens for winter in harsh climates to extend their life. And trim back any bushes or branches that rub against screens; abrasion is a common cause of tears.
If your windows themselves need attention, our guide to weatherproofing windows for winter covers sealing and efficiency. For broader home maintenance skills, see the essential homeowner toolkit.
Sliding Screen Doors: Same Technique, Bigger Scale
The exact same process works for sliding patio screen doors — they’re just larger frames, usually with wheels at the bottom. Remove the door by lifting it up and swinging the bottom out (there are adjustment screws at the bottom that retract the wheels). Rescreen as described above, using pet-resistant mesh if you have animals that charge through it. While the door is off, clean the track thoroughly and check the wheels — worn wheels make the door drag and are a $5 replacement that transforms how it slides. Lubricate the track with silicone spray (not WD-40, which attracts dirt). A rescreened, smooth-sliding patio door feels like a meaningful upgrade for about $25 and an hour of work.
Practical Takeaway
Patch small tears with adhesive repair kits; rescreen larger damage with new mesh, spline, and a $5 spline roller. Remove the frame, pull the old spline, lay new mesh oversized, roll in new spline keeping it taut, trim the excess, and reinstall. It’s a 20-minute, $15 project that makes windows look new and keeps the bugs where they belong — outside. Family Handyman’s screen repair guides include helpful photos of the spline-rolling technique.