How Do I Fix Stick Drift on My Controller at Home
Your character drifts left when you’re not touching the stick. Your aim pulls inexplicably in menus. Welcome to stick drift — the slow death of analog sticks, affecting PlayStation, Xbox, Nintendo Switch, and third-party controllers alike. It’s caused by physical wear, it’s nearly inevitable with enough use, and manufacturers’ response (warranty roulette, paid repairs, new controllers at $70+) frustrates everyone. But you can often fix it at home — from 30-second software tricks to full stick-module replacement. Here’s every fix, ordered from easiest to most involved.
Level 0: The 30-Second Fixes (Try These First)
Recalibrate
Every platform has a calibration or reset procedure: PlayStation 5 (turn off, press the reset pinhole button on the back for 5 seconds, reconnect via USB); Xbox (no manual recalibration — but power-cycling and firmware updates via the Accessories app resolve software-side drift); Switch (System Settings → Controllers → Calibrate Control Sticks — Nintendo’s built-in tool actually fixes minor drift surprisingly often); Steam (controller settings per-device calibration). Calibration corrects the controller’s neutral-point mapping — if the drift is software-side (incorrect center registration), this fixes it permanently.
Update firmware
Controller firmware updates via the console or PC app (Xbox Accessories, PlayStation PC app, Switch system updates) regularly include stick-deadzone and calibration improvements. An astonishing number of “drift” cases are fixed by an update the owner never installed.
Adjust deadzones in-game
Most competitive games let you set per-stick deadzones — the input threshold below which the game ignores stick movement. Increasing the deadzone 5–10% masks minor drift completely with negligible gameplay impact. This is not a fix, it’s a workaround — but for mild drift, it’s a permanent, free, 30-second workaround. Every competitive player should know their game’s deadzone settings regardless.
Level 1: Cleaning (The Most Common Actual Fix)
The majority of stick drift is mechanical: dust, skin oils, food debris, and general grime accumulating in the potentiometer mechanism, creating false contact readings. Cleaning resolves a large share of cases:
Compressed air method
Lift the stick’s rubber skirt gently, blast short bursts of compressed air (held upright — liquid propellant damages electronics) into the mechanism while rotating the stick fully. This dislodges loose debris. Quick, safe, and effective for dust-caused drift.
Isopropyl alcohol method
For stubborn grime: apply 90%+ isopropyl alcohol around the stick base (it evaporates cleanly without residue), rotate the stick extensively to work it through the mechanism, let dry completely. Higher concentration is better — 70% leaves more water behind. This dissolves the oil films that cause erratic readings.
Contact cleaner (for the committed)
Electronic contact cleaner (DeoxIT or equivalent) applied into the potentiometer is the professional-grade version — it cleans and leaves a protective film. Requires partial disassembly on most controllers but dramatically extends stick life. This is the fix repair shops actually perform for “cleaning service” fees.
Prevention matters as much as cure: wash hands before long sessions (oils are the enemy), store controllers in cases or drawers (dust settles constantly), and consider thumbstick covers (they reduce debris ingress at the skirt). Basic maintenance habits — the same diligence behind keeping an old computer running fast — apply directly to controller longevity.
Level 2: Opening the Controller
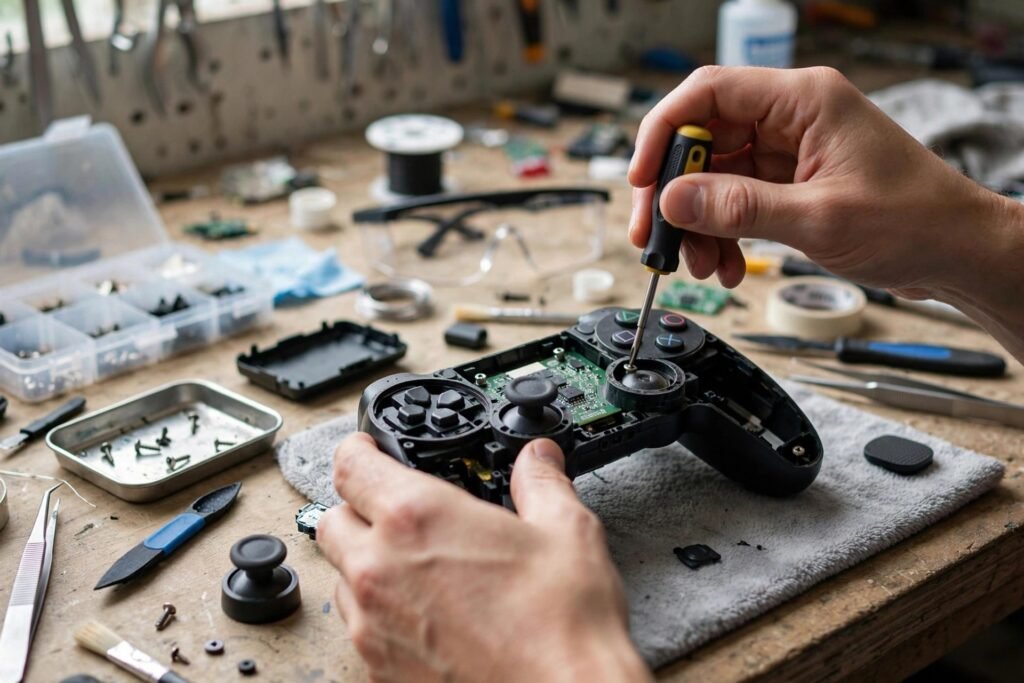
When cleaning from outside fails, the drift is inside — worn potentiometer contacts or damaged components. Opening the controller voids warranties (check warranty status first — if covered, use it) but enables real repairs. The essential precautions: work on a clean, well-lit surface; photograph each disassembly step (screw positions, ribbon cable orientations); use proper tools (small Phillips and Torx drivers — a iFixit’s repair guides list exact tools per controller model); and ground yourself against static (touch metal periodically — static kills electronics silently).
Inside, you’ll find the stick modules: small boxes containing the potentiometers. Inspection targets: visible debris or corrosion on the potentiometer contacts (clean with isopropyl and a cotton swab); worn carbon pads (the resistive tracks wear with use — the fundamental cause of age-related drift); and loose or damaged ribbon cables (reseat carefully). For technically confident owners, this level resolves most remaining cases.
Level 3: Stick Module Replacement (The Permanent Fix)
The definitive repair: replacing the entire stick module. Replacement sticks cost $5–$15 (OEM-quality Alps modules for PlayStation/Xbox; Nintendo offers its own); the catch is soldering — most controllers’ sticks are soldered to the board, requiring desoldering the old module and soldering the new one (14+ solder points). This demands a soldering iron, desoldering pump or wick, and genuine soldering skill — cold joints cause worse problems than drift.
The game-changer: Hall effect stick modules — replacements using magnetic sensors instead of physical potentiometer contacts. No contact means no wear means no drift, ever, in theory. Hall effect sticks ($10–$25) are the enthusiast community’s recommended permanent fix, with excellent long-term reports. Some newer controllers and third-party pads ship with Hall effect sticks stock — if buying new, this is the feature to look for. Soldering skill remains the barrier; local repair shops will do the swap for $30–$60 if you’d rather not learn.
Before attempting this level, honestly assess: a new controller is $60–$70. If the repair risks destroying the controller and you lack soldering experience, the economics favor replacement — or a repair shop. There’s no shame in knowing your limits; there’s only the cost of learning them on a DualSense.
When to Stop Fixing and Replace
Replace rather than repair when: the controller has multiple failures (drift plus button issues plus battery problems — the repair cascade isn’t worth it); you’ve already replaced sticks once (repeat failures suggest board-level issues); the controller is an older generation (money is better spent on current hardware); or your time is worth more than the repair (two hours of frustrating micro-soldering to save $40 is a bad trade for most people). Also consider: drift within the warranty period is the manufacturer’s problem — exercise warranties aggressively, and document everything.
And for the toolkit that makes all of this possible — from controllers to household fixes — having the right basic repair tools on hand turns “I should fix that” into actually fixing it.
The Bottom Line
Fix stick drift at home in escalating levels: recalibrate and update firmware (30 seconds, fixes software drift), adjust deadzones (masks mild drift free), clean with compressed air and isopropyl alcohol (resolves most mechanical drift), open and clean/repair internals (for persistent cases), or replace the stick module — preferably with drift-proof Hall effect sticks — for a permanent fix. Know when the economics favor replacement. Most drift is dust and wear, both fixable; the only unforgivable drift is the kind you tolerate for months before trying the 30-second fixes.
When to Repair vs. Replace
Not every drifting controller deserves surgery. If the controller is under warranty, use it — manufacturers have generally become more accommodating about drift repairs. If it is a budget third-party controller, replacement often costs less than the parts and time of repair. But for premium first-party controllers, DIY repair usually wins on economics and keeps e-waste down. iFixit hosts free step-by-step repair guides with difficulty ratings for nearly every major controller, which is the best way to judge whether a fix is within your comfort zone before opening anything. Keep screws organized, photograph each step, and never force ribbon cables. And if you do replace rather than repair, consider donating the drifting controller to a repair-minded friend or electronics recycler instead of landfilling it.
Frequently Asked Questions
What causes stick drift?
Mostly physical wear and debris: dust and oils in the potentiometer mechanism cause false readings, and the resistive contacts wear with use. Software calibration issues cause a minority of cases.
Can stick drift be fixed without opening the controller?
Often yes — recalibration, firmware updates, deadzone adjustments, and external cleaning (compressed air, isopropyl alcohol) resolve the majority of cases without disassembly.
What are Hall effect sticks?
Stick modules using magnetic sensors instead of physical contact potentiometers. No contact means no wear, making them effectively immune to drift — the enthusiast-recommended permanent fix.
Does opening my controller void the warranty?
Yes, on virtually all controllers. Check warranty status first — if covered, use the manufacturer’s repair/replacement process instead of DIY.
How do I prevent stick drift?
Wash hands before playing, store controllers dust-free, use thumbstick covers, and clean periodically. For new purchases, choose controllers with Hall effect sticks stock.