How to Push Back Cuticles: The Safe, Correct Method
Learning how to push back cuticles properly is one of the simplest upgrades you can make to your nail routine. Pushed-back cuticles make nails look longer, help polish apply cleanly without flooding the edges, and reduce hangnails. But done wrong — especially cutting them — it causes pain, infection risk, and ragged regrowth. This guide shows the safe, dermatologist-approved method.
What Are Cuticles, Actually?
The cuticle is the thin layer of dead skin that seals the gap between your nail plate and the surrounding skin. It acts as a protective barrier, keeping bacteria and moisture out of the nail matrix where new nail grows. This barrier function is why dermatologists universally advise against cutting cuticles — you are removing your nail’s natural defense system.
Pushing cuticles back (rather than cutting) tidies their appearance while leaving the protective seal largely intact. It is the safe middle ground between ignoring them entirely and the damaging habit of cutting or biting them.
What You Will Need
- Cuticle remover (optional but helpful): a gentle cream or liquid, usually with alpha-hydroxy acids, that softens cuticle skin. Much safer than cutting.
- Orangewood stick or cuticle pusher: wood is gentlest; metal pushers work but require a lighter touch. Silicone-tipped pushers are a good middle option.
- Warm water for soaking, or do it right after a shower when cuticles are naturally soft.
- Cuticle oil or hand cream for aftercare.
- A soft towel.
Step-by-Step: How to Push Back Cuticles Safely
Step 1: Soften first
Soak your fingertips in warm (not hot) water for 5 to 10 minutes, or time your cuticle care for right after a shower. Soft cuticles push back easily; dry cuticles tear. If using cuticle remover cream, apply it now and wait the time directed on the product (usually 1 to 2 minutes).
Step 2: Push gently
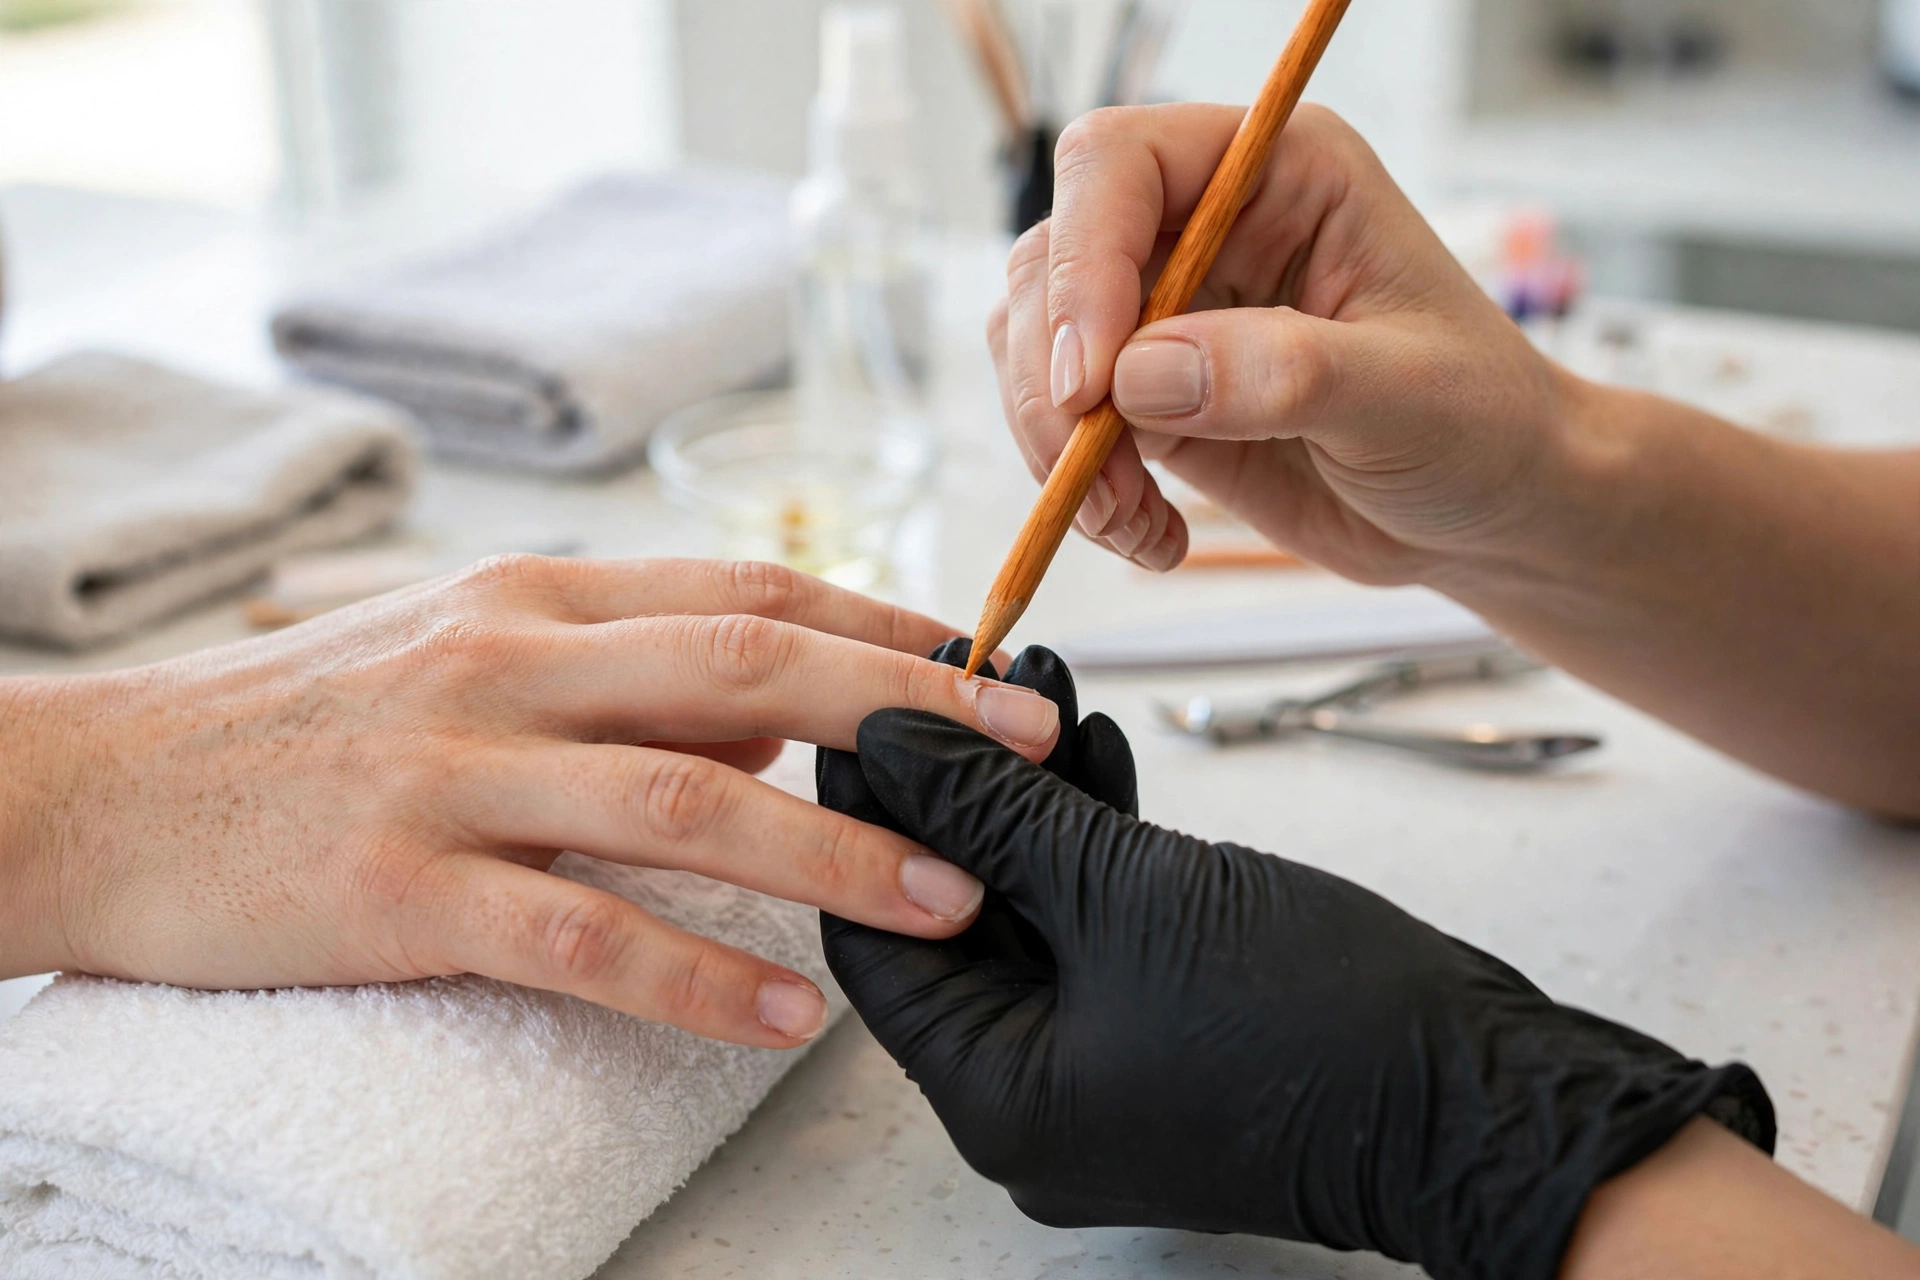
With your orangewood stick or pusher held at a shallow angle, gently push the cuticle back toward the knuckle using small, light strokes. Work from one side of the nail to the other. You should feel no pain — if it hurts, you are pushing too hard or the cuticle is not soft enough. The goal is to reveal a clean half-moon (lunula) and a tidy nail edge, not to scrape aggressively.
Step 3: Clean up gently
If there are loose, flaky bits of dead cuticle skin, you can gently lift them with the angled tip of the stick. Never pull or tear — if it does not come away easily, leave it. Nippers should only ever be used on true hangnails (torn dead skin), never on the living cuticle seal.
Step 4: Moisturize
Massage cuticle oil or a rich hand cream into each nail and cuticle. This keeps the area supple, prevents hangnails, and makes the whole nail look healthier. Daily cuticle oil is the single best habit for ongoing cuticle health.
How Often Should You Do This?
Once a week is plenty for most people — typically as part of a regular manicure routine, whether DIY or professional. Daily cuticle oil in between keeps everything soft so the weekly push-back stays easy. If your cuticles are in rough shape from neglect, do it weekly for a month and you will see dramatic improvement, then maintain.
What NOT to Do
- Do not cut your cuticles. Dermatologists are unanimous: cutting breaks the protective seal and invites infection (paronychia — painful, swollen nail folds). It also causes cuticles to grow back thicker and more ragged.
- Do not push aggressively or use sharp metal tools with force. You can dent the nail plate or damage the matrix, causing ridges that take months to grow out.
- Do not work on dry cuticles. This is how tearing and hangnails happen.
- Do not bite or pick at cuticles. Beyond the infection risk, it creates the exact ragged look you are trying to fix.
- Do not push back inflamed or infected cuticles. If the area is red, swollen, or painful, leave it alone and see a doctor if it does not improve.
The American Academy of Dermatology’s nail care guidance reinforces these points — particularly the no-cutting rule, which surprises many people who grew up watching it done at salons.
At the Salon: How to Advocate for Yourself
Many nail technicians still cut cuticles by default. It is absolutely okay to say, “Please push back, don’t cut my cuticles.” A good technician will respect this — and many high-end salons have already moved away from cutting. If a salon insists on cutting or uses unsanitized tools, consider it a red flag about their overall hygiene standards.
Dealing With Common Cuticle Problems
Hangnails
Clip hangnails cleanly at the base with sterilized nippers — do not tear them. Then moisturize. Regular cuticle oil prevents most hangnails from forming in the first place.
Dry, cracked cuticles
Usually a sign of dehydration, harsh soaps, or cold weather. Increase cuticle oil to twice daily, switch to a gentler hand soap, and wear gloves for cleaning and cold exposure.
Overgrown cuticles
After long neglect, cuticles can creep far up the nail. Do not try to fix months of growth in one session — push back gently a little at a time over several weekly sessions. Patience prevents tearing.
Ragged cuticles from biting
Keep nails trimmed short (less to bite), apply bitter-tasting deterrent polish if needed, and check the Cleveland Clinic’s guide to nail health for signs that biting has caused damage needing attention, and keep cuticle oil nearby — moisturized cuticles are less tempting to pick at. The habit often improves once the area stops looking ragged.
Cuticle Care and Your Manicure
Properly pushed-back cuticles transform how polish looks. Polish can be applied closer to the edge without flooding onto skin, which means cleaner lines and longer wear — polish on skin lifts and chips fast. If your polish tends to thicken between manicures, knowing how to thin out nail polish keeps application smooth. And clean tools matter for the whole routine — cleaning your makeup brushes regularly follows the same hygiene principle as using clean nail tools.
Frequently Asked Questions
Is it bad to push back cuticles?
Done gently on softened cuticles, no — it is the recommended alternative to cutting. Done aggressively on dry cuticles, yes, it can cause damage. Technique and softening are everything.
Can I use my fingernail instead of a tool?
In a pinch, yes — your thumbnail is softer than any tool and works for light maintenance. But it is less precise and harder to clean than a dedicated stick.
Should I push back toenail cuticles too?
Yes, the same principles apply. Toenail cuticles are often neglected; gentle pushing during pedicures keeps them healthy and reduces ingrown toenail risk.
What is the white half-moon at the base of my nail?
That is the lunula, the visible part of the nail matrix. Pushing cuticles back reveals more of it, which is normal and healthy — it is not something to scrub at or “clean.”
The Bottom Line
Pushing back cuticles is simple: soften with warm water, push gently with an orangewood stick, never cut, and moisturize after. Do it weekly, oil daily, and speak up at the salon. Your nails will look longer and cleaner, your polish will last longer, and you will avoid the infections and ragged regrowth that cutting causes. Small habit, visible difference.