How to Organize Cables Behind Your Desk (Once and For All)
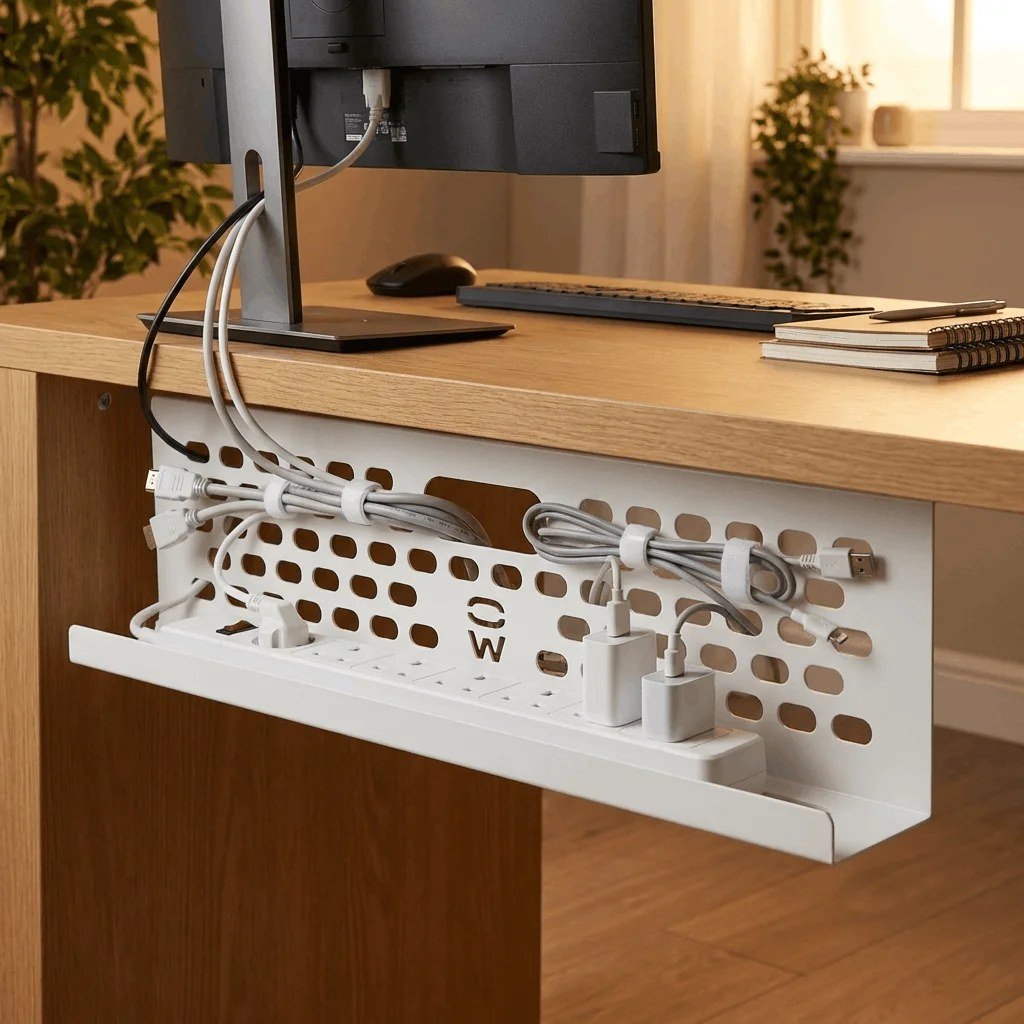
Behind every tidy desk is a rat’s nest of cables — or a cable management system that took one focused afternoon. If you’re wondering what the best way to organize cables behind your desk is, the answer isn’t expensive: about $30 in supplies and a willingness to unplug everything once.
I’ve done this for my own setup and several friends’. The method below is the one that actually stays organized, because it accounts for the real enemy: future you, adding ‘just one more cable.’
The short answer: mount a cable tray under the desk ($15–$25), route everything through it with reusable Velcro ties, bundle related cables in a neoprene sleeve, label both ends of every cable, and mount the power strip to the desk or wall. Unplug everything and start fresh — reorganizing around the mess never works.
The Supplies (About $30 Total)
You need four things: an under-desk cable tray (the IKEA Signum or any $15–$25 metal mesh tray — it screws under the desk and holds power strips and excess cable), reusable Velcro cable ties ($8 for a big roll — never use zip ties; you’ll need to redo things and zip ties punish that), a neoprene cable sleeve or spiral wrap ($10) for bundling the cables that run from desk to floor, and a label maker or simple adhesive labels.
Optional but worth it: adhesive cable clips ($6) to route individual cables along desk edges, and a power strip with a long cord and flat plug so it sits flush. Total damage: $25–$40. Compare that to the daily low-grade annoyance of the spaghetti, and it’s the best ROI in home office upgrades.
The Method: Unplug Everything First
This is the step people resist and the reason most attempts fail: unplug everything. Every cable, every device. Trying to organize around a live mess is like organizing a closet without taking anything out — you just shove the chaos into neater-looking piles. Take a photo of the back of your PC/monitor first so you know what goes where.
Now mount the tray under the desk toward the back, and mount or place the power strip inside it — getting the power strip off the floor is half the battle. Plug everything back in one device at a time, routing each cable through the tray with enough slack to pull the device forward for access, but not so much that it puddles. Bundle the monitor power + display cable + USB together with Velcro every 8–10 inches.
- Cable tray under the desk ($15–$25) — holds power strip + slack
- Velcro ties, not zip ties — you’ll redo things eventually
- Neoprene sleeve for the desk-to-floor cable bundle
- Label both ends of every cable (trust me on this)
- Adhesive clips to route cables along desk edges
- Power strip mounted in the tray, off the floor
Label Everything (Future You Says Thanks)
Six months from now, you’ll need to unplug one thing and face five identical black cables. Label both ends of every cable with what it connects to (‘Monitor power,’ ‘Dock USB-C,’ ‘Speaker R’). A $20 label maker is ideal; masking tape and a marker work fine. This takes ten minutes during setup and saves thirty minutes of tracing cables every time you change anything.
Also label the power strip itself — which switch or outlet feeds what. And take a final photo of the organized back panel for reference. It sounds obsessive; it’s the difference between a five-minute device swap and an archaeological dig.
Keeping It That Way
The system fails when new cables bypass it. The rule: every new cable gets routed through the tray and labeled before the device is ‘done’ being set up — two extra minutes that preserve the whole system. Keep spare Velcro ties in the desk drawer; they’re the maintenance tool.
Do a 10-minute audit twice a year: unplug dead cables (that old phone charger, the USB hub you replaced), re-tighten sagging bundles, and check that nothing’s pulling at ports. And if you’re adding a lot of new gear — a new monitor, a docking station — it’s worth redoing the affected section properly rather than draping. Cable management isn’t a project, it’s a habit. A very low-effort, high-satisfaction habit.
What Is the Best Way to Organize Cables Behind My Desk in a Small Apartment?
Small spaces amplify cable chaos because everything is visible and within arm’s reach. The apartment-friendly version of this guide’s system: a compact under-desk tray (or even a sturdy fabric cable box, $15, if drilling is prohibited), adhesive cable clips instead of screwed mounts (landlord-safe), and ruthless minimization — every device you can eliminate removes cables permanently.
The biggest wins in small apartments are wireless substitutions: a wireless charger pad instead of three cables, Bluetooth peripherals instead of wired, a single USB-C dock instead of five separate connections. Each wireless swap deletes a cable from the system forever — better than any organizer. And go vertical: monitor arms with cable channels, wall-mounted power strips behind the desk, and shelves that hide the tray entirely.
For renters specifically: adhesive mounting is your friend (3M Command strips hold surprising weight), tension rods can hide cables behind desks, and fabric cord covers ($12) make the one visible floor run look intentional. When you move, the whole system peels off without a trace — which your security deposit will appreciate.
Related reading: what is the best cheap laptop for college students in 2026 · how to speed up your old slow computer without buying a new one
The Bottom Line
Unplug everything, mount a $20 cable tray under the desk, route all cables through it with Velcro ties, bundle the floor run in a sleeve, and label both ends of every cable. About $30 in supplies and one afternoon. Maintain it with a 10-minute audit twice a year and a strict ‘new cables go through the tray’ rule.
Sources: IKEA Signum cable management tray · Wirecutter cable management guide