What Is the Best Way to Clean Grout Between Tiles
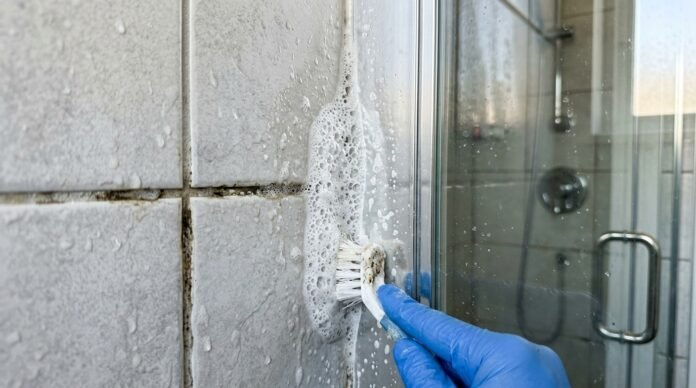
Dirty grout is the great equalizer of bathrooms and kitchens. You can have beautiful tile, but if the grout lines are brown, dingy, or speckled with mildew, the whole room looks neglected. I once spent a weekend deep-cleaning a rental bathroom and the grout transformation alone made it look renovated. The tile hadn’t changed at all — just the lines between them.
Here’s the best way to clean grout between tiles, from gentle maintenance to heavy-duty restoration, plus how to keep it clean afterward.
What Is the Best Way to Clean Grout Between Tiles?
The answer depends on how dirty your grout is. Always start with the gentlest method and escalate only if needed — aggressive cleaners and hard scrubbing can erode grout over time, especially on older installations. Work in small sections, and always test any cleaner in an inconspicuous spot first.
Level 1: Regular Maintenance (Prevention)
If your grout is in decent shape, keep it that way. After showers, squeegee the tile walls — 30 seconds of work prevents the soap scum and mineral buildup that discolors grout. Run the bathroom exhaust fan during and for 20 minutes after showers to reduce the moisture that feeds mildew. For kitchen backsplashes, wipe down grout lines weekly with a damp microfiber cloth before grease builds up.
A weekly spray with a daily shower cleaner (or a DIY mix of water and a squirt of dish soap) keeps light buildup from becoming a project. This is the boring stuff that means you never need the heavy-duty methods below.
Level 2: Baking Soda Paste and Scrubbing
For moderately dirty grout, make a paste of baking soda and water (roughly 3:1), apply it to the grout lines, and let it sit for 10–15 minutes. Then scrub with a grout brush or old toothbrush using firm, consistent strokes along the grout lines. Rinse with clean water and wipe dry.
For extra cleaning power, spray white vinegar over the baking soda paste and let it fizz for a few minutes before scrubbing. One critical warning: never use vinegar or any acid on natural stone tile (marble, travertine, limestone) — acid etches stone permanently. This method is safe for ceramic and porcelain tile only.
A stiff grout brush ($8–$12) is worth buying — it concentrates force on the grout line far better than a toothbrush, and for a whole bathroom floor, the time savings are enormous. Some people swear by an old electric toothbrush for the job; it works surprisingly well on small areas.
Level 3: Oxygen Bleach (The Heavy Hitter)
For seriously stained grout, oxygen bleach (sodium percarbonate, sold as OxiClean) is the professional’s secret weapon. Mix it with hot water per the package directions, apply to grout lines, let it sit for 15–30 minutes, scrub, and rinse thoroughly. It’s dramatically more effective than baking soda, color-safe, and far gentler than chlorine bleach — safe for colored grout and most tile types.
For floors, you can mop the solution on and let it dwell. For walls, apply with a sponge and work in sections so it doesn’t dry out before you scrub. This method handles years of accumulated grime, soap scum, and light mildew staining.
Level 4: Steam Cleaning and Chlorine Bleach (Last Resorts)
A steam cleaner with a grout attachment blasts grime out of grout lines with superheated steam — no chemicals at all. It’s highly effective and satisfying to use, though a good steam cleaner costs $100–$200 (rentable in some areas). The heat also kills mold and mildew on contact.
Chlorine bleach (diluted 1:10 with water) kills mold and whitens grout aggressively, but use it sparingly: it can discolor colored grout, damage surrounding materials, and the fumes require serious ventilation. Never mix bleach with vinegar or any acid — the combination creates toxic chlorine gas. Honestly, oxygen bleach handles 95 percent of what chlorine bleach does, with far fewer risks.
Dealing With Mold and Mildew Specifically
If your grout has black spots that return after cleaning, you’re dealing with mold, not just dirt. Surface cleaning removes the visible growth, but mold roots penetrate porous grout. After cleaning, treat the area with a mold-inhibiting product (concrobium or similar), improve ventilation, and fix any moisture sources — a constantly wet grout line will always grow mold regardless of cleaning. Our guide to preventing mold in the bathroom addresses the root causes.
If grout is crumbling, cracked, or moldy deep throughout, cleaning won’t save it — it needs regrouting. Removing old grout with a grout saw or oscillating tool and applying fresh grout is a very doable DIY project that makes tile look brand new.
Sealing: The Step Everyone Skips
Here’s what separates grout that stays clean from grout that’s dirty again in three months: sealer. After deep-cleaning (and letting grout dry for 48–72 hours), apply a penetrating grout sealer with a small applicator bottle. It soaks into the porous grout and repels water, oil, and stains. Reseal annually in showers, every 2–3 years elsewhere. This $20, one-hour job is the highest-ROI maintenance in all of tile care.
Note: epoxy grout doesn’t need sealing — it’s non-porous by nature. If you’re regrouting anyway, consider epoxy for showers; it costs more and is harder to install, but it essentially never stains.
What Not to Do
Avoid metal brushes or abrasive pads on grout — they erode the surface and make it more porous (and thus dirtier faster). Don’t use wax-based cleaners on tile floors; they build up and yellow. And never use acidic cleaners on stone — I’ll say it twice because the damage is permanent and heartbreaking.
For broader bathroom upkeep, our guide to cleaning stainless steel appliances covers the other shiny surfaces, and Better Homes & Gardens has excellent seasonal cleaning checklists.
Grout Color Refresh: When Cleaning Isn’t Enough
Sometimes grout is clean but permanently discolored — years of staining that no cleaner will reverse. Before regrouting, consider grout colorant (sometimes called grout paint or grout stain). Products like Grout Renew let you paint grout lines a new color, effectively giving you fresh-looking grout for about $15 and a few hours of careful application with a small brush or applicator bottle.
It works best when going darker or refreshing the original color — covering light grout with white colorant looks great; trying to make dark grout light is less successful. The colorant also seals as it colors, giving you stain protection built in. It’s fiddly work, but for a bathroom floor, the before-and-after is dramatic.
Practical Takeaway
Maintain with squeegeeing and weekly wipe-downs, clean moderately dirty grout with baking soda paste (or vinegar on ceramic/porcelain only), attack heavy staining with oxygen bleach, use steam or diluted chlorine bleach only as last resorts, treat mold at its moisture source, and always seal clean grout to keep it that way. Clean grout transforms tile — and it’s one of the cheapest dramatic improvements you can make in a bathroom or kitchen.