What Is the Best Way to Patch a Hole in Drywall
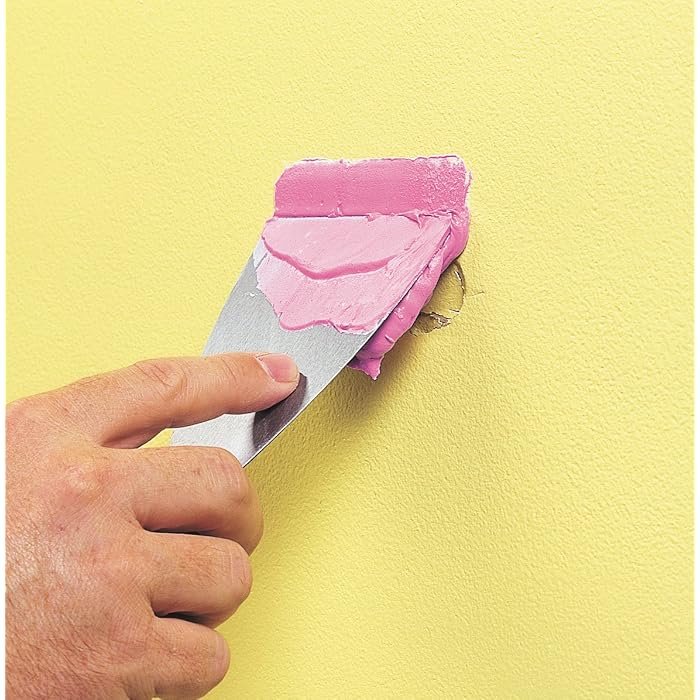
Doorknobs meet walls. Furniture gets moved. Kids happen. Drywall holes are inevitable, and they range from tiny nail holes to “someone put their elbow through the wall” disasters. The good news: drywall repair is one of the most satisfying DIY skills because the results are genuinely invisible when done right. I’ve patched everything from pinholes to a full doorknob-sized crater, and the process is the same every time — just scaled to the hole.
Here’s the best way to patch a hole in drywall, for every size of damage.
What Is the Best Way to Patch a Hole in Drywall?
The method depends on the hole size. Small holes (nail holes, screws, under 1/2 inch) need only spackle. Medium holes (1/2 inch to 6 inches — doorknob holes, the classic) need a patch plus joint compound. Large holes (over 6 inches) need a drywall piece, backing support, and joint compound with tape. Using the right method for the size is what makes repairs invisible.
Small Holes: Spackle and Done (5 Minutes)
For nail holes, screw holes, and small dings: press lightweight spackle into the hole with a putty knife, scrape flush, let it dry (15–30 minutes for lightweight spackle), and sand lightly with 120-grit sandpaper. That’s it. For a flawless finish, spot-prime before touch-up paint — spackle absorbs paint differently than the surrounding wall, and unprimed patches “flash” (show as dull spots).
Pro tip: for tiny nail holes, you can skip the putty knife — press spackle in with your finger and wipe flush with a damp cloth. Fast and clean.
Medium Holes: The Patch Method (30–60 Minutes Active Time)
For doorknob-sized holes (the most common drywall damage), use a self-adhesive mesh patch ($5–$8 for a multi-pack) or a California patch (a drywall piece with paper flanges). The mesh patch is easiest:
- Clean up the hole: Remove loose debris and trim any torn paper with a utility knife. The patch needs a flat surface.
- Apply the self-adhesive mesh patch centered over the hole, pressing firmly. For holes near the 6-inch limit, use the California patch method instead — mesh alone can sag on larger holes.
- Apply joint compound (not spackle — joint compound is stronger and sands better for larger areas) over the patch with a 6-inch taping knife. Press firmly on the first coat to push compound through the mesh. Feather the edges 2–3 inches beyond the patch.
- Let it dry completely (joint compound dries white when ready — usually 12–24 hours depending on thickness and humidity). Don’t rush this; sanding wet compound ruins the repair.
- Apply a second, thinner coat with a wider knife (8–10 inch), feathering further out. The goal is a gradual transition, not a bump.
- Sand smooth with 120-grit, then 220-grit sandpaper. Use a sanding sponge for control. Wipe away dust with a damp cloth.
- Prime and paint. Always prime the repair — joint compound is porous and paint soaks in unevenly without primer.
The California (hot) patch alternative: cut a drywall square 2 inches larger than the hole, score the back and snap off the gypsum leaving paper flanges, apply joint compound to the flanges, and press into the hole. It creates an exceptionally strong, invisible repair — worth learning for holes in the 4–8 inch range.
Large Holes: Full Drywall Repair (Half Day)
For holes over 6 inches (or any hole where the drywall is structurally compromised):
- Cut the damage into a clean rectangle using a drywall saw or oscillating tool, extending to the centers of the nearest studs on each side when possible.
- Install backing: screw wood furring strips (1x3s) inside the opening, spanning beyond the hole edges, to support the new piece. If you cut to stud centers, screw directly to the studs.
- Cut a drywall piece to fit (measure twice), matching the existing drywall thickness (usually 1/2 inch for walls).
- Screw the patch to the backing or studs every 6–8 inches, dimpling screws slightly without breaking the paper.
- Tape the seams with paper drywall tape (stronger than mesh for large repairs) embedded in joint compound.
- Apply 2–3 coats of compound, each wider than the last, sanding between coats. This “feathering” is what makes the repair disappear.
- Texture-match if needed (see below), prime, and paint.
Matching Wall Texture
A perfectly flat patch on a textured wall stands out. Match common textures: orange peel — use aerosol texture spray ($12–$15) in light coats; knockdown — spray heavier, let it set 10–15 minutes, then flatten lightly with a taping knife; smooth walls — just sand carefully, no texture needed. Practice on cardboard first. Texture matching is the difference between “good repair” and “invisible repair.”
Materials: What to Buy
For a basic drywall repair kit: lightweight spackle (small holes), all-purpose joint compound (patches — buy the small tub, not the 5-gallon bucket, unless you’re doing a lot), self-adhesive mesh patches in a couple of sizes, a 6-inch and 10-inch taping knife set, 120 and 220-grit sandpaper or sanding sponges, and a quart of primer. Total: $30–$50, and it handles dozens of future repairs.
Joint compound vs. spackle: spackle dries fast and is great for small holes but shrinks and is weaker on larger repairs. Joint compound is stronger, sands smoother, and is better for anything over 1/2 inch — but takes longer to dry. Use the right one for the job.
Common Mistakes
- Too much compound in one coat. Thick coats crack as they dry and take forever. Multiple thin coats always win.
- Sanding before it’s dry. If the compound isn’t uniformly white and hard, wait longer.
- Skipping primer. The number-one cause of visible patches. Always prime.
- Not feathering wide enough. The compound should transition over 8–12 inches for large patches, not 2 inches. Wide, gradual transitions disappear; narrow ones create visible bumps.
- Painting with the wrong sheen. Touch-up paint must match the wall’s sheen exactly, or the patch shows. When in doubt, repaint the entire wall.
For more wall projects, our guide to painting like a professional covers the finishing steps, and wallpaper removal often reveals damage that needs exactly these skills.
Practical Takeaway
Match the method to the hole: spackle for pinholes, mesh patch plus joint compound for medium holes, full drywall replacement with backing for large ones. Apply thin coats, let each dry fully, feather wide, sand smooth, texture-match, and always prime before painting. Done patiently, drywall repair is genuinely invisible — the wall looks like the hole never happened. Family Handyman’s drywall repair tutorials demonstrate the feathering technique that makes patches disappear.