What Is the Best Way to Remove Wallpaper without Damaging Walls
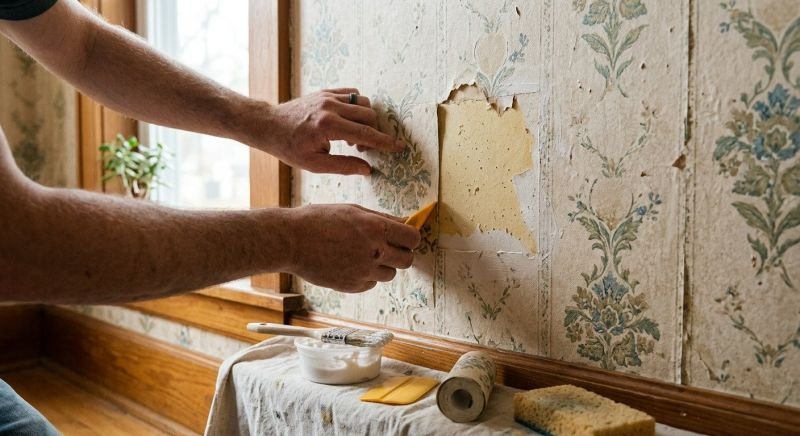
Removing wallpaper is one of those jobs everyone dreads — and for good reason. Done wrong, it tears up drywall, leaves you with a gummy mess, and turns a weekend project into a month-long saga. I know because my first attempt involved a lot of swearing, a putty knife, and a wall that looked like it had survived a war. My second attempt, armed with actual knowledge, went smoothly in a single weekend.
The secret is that there’s no single “best” method — the right approach depends on what kind of wallpaper you’re dealing with. Here’s how to figure out what you have and remove it without damaging the walls underneath.
What Is the Best Way to Remove Wallpaper Without Damaging Walls?
The golden rule: start with the gentlest method and escalate only as needed. Most wallpaper damage happens when people go straight to aggressive scraping on walls that would have released easily with steam or water. Patience at the start saves drywall repairs at the end.
Step 1: Identify Your Wallpaper Type
Before you touch anything, figure out what you’re dealing with. Try peeling back a corner or a seam:
- Peel-and-stick or strippable wallpaper: The backing releases cleanly, often in full sheets. If a corner peels off easily and the wall underneath looks clean, congratulations — you won the wallpaper lottery. Just peel slowly at a low angle.
- Traditional paper wallpaper: Tears in small pieces and usually needs water or steam to release the paste.
- Vinyl-coated wallpaper: Has a plastic-like outer layer. The vinyl face often peels off separately, leaving a paper backing that needs soaking.
- Wallpaper over unprimed drywall: The nightmare scenario. Without primer as a barrier, paste bonds directly to the paper face of the drywall, and removal can tear it. This requires the gentlest approach and the most patience.
Also check how many layers you’re dealing with — older homes sometimes have three or four layers stacked up. Each layer needs to come off separately.
Step 2: Prep the Room
Turn off power to outlets and switches on the walls you’re working on (you’ll be using water and steam). Remove outlet and switch covers. Cover floors with drop cloths or plastic sheeting taped to the baseboards — this gets wet and messy. Have trash bags ready; wallpaper debris multiplies fast.
Method 1: Dry Stripping (Try This First)
Using a putty knife, loosen a bottom corner or seam and pull slowly, keeping the paper close to the wall at a low angle. If it comes off in sheets leaving minimal residue, keep going — no water needed. Work in sections and don’t yank; steady, even pressure prevents tearing the drywall face.
Method 2: Hot Water and Fabric Softener (The Classic)
For traditional wallpaper that won’t dry-strip: score the surface lightly with a wallpaper scoring tool (about $10 — it perforates the surface so water can penetrate without gouging the wall). Then sponge or spray on a solution of hot water mixed with fabric softener (roughly 1:1) or a commercial wallpaper remover like DIF concentrate.
Let it soak for 10–15 minutes — this is critical; impatience here causes damage. The paper should bubble and loosen. Then scrape gently with a plastic putty knife (metal gouges drywall; plastic is far more forgiving), working from the bottom up. Re-wet stubborn areas rather than forcing them.
Method 3: Steam (Best for Stubborn Jobs)
A wallpaper steamer (rentable for $50–$75/day, or purchasable for around $60) is the professional’s choice for difficult removals — multiple layers, old paste, or large areas. Hold the steam plate against the wall for 10–15 seconds per section, then scrape while the paste is soft. Work in small sections and keep moving; holding steam in one spot too long can soften drywall.
Steam is especially effective on vinyl-coated wallpaper: steam the surface, peel off the vinyl face, then steam and scrape the remaining paper backing. Two passes, but each is straightforward.
Dealing With Leftover Paste Residue
After the paper is off, the wall will likely feel slightly tacky or slimy — that’s paste residue, and it must come off before you paint. Paint over paste and you’ll get cracking, bubbling, and adhesion failure. Wash the walls with hot water and a TSP substitute or a dedicated paste remover, using a sponge and changing the water frequently. Rinse with clean water. Let the walls dry completely, then run your hand over them — they should feel clean, not sticky.
Repairing Minor Damage
Some damage is normal, especially on older walls. Small tears in the drywall paper face can be sealed with an oil-based or shellac-based primer (like Zinsser BIN) — this prevents the torn paper from bubbling when you paint. Then skim-coat with joint compound, sand smooth when dry, and prime the repairs. Larger gouges get the full treatment in our guide to patching a hole in drywall.
Never skip the primer-sealer step on torn drywall. It’s the difference between an invisible repair and a permanent blemish.
When to Call a Professional
Consider hiring out if: the wallpaper is over unprimed drywall and tearing badly, there are many layers throughout the whole house, the walls are plaster (which handles moisture differently than drywall), or you simply value your weekend more than the $300–$600 a pro charges per room. There’s no shame in it — pros with commercial steamers can do in hours what takes DIYers days.
For more wall-related projects, see our guide to painting a room like a professional once the walls are clean and prepped.
Special Case: Wallpaper on Ceilings
Ceiling wallpaper is the same process turned upside down — literally harder on your arms, neck, and patience. The methods don’t change, but the ergonomics do. A steamer with a long hose is almost mandatory; sponging hot water overhead is miserable and drips everywhere (wear safety glasses and old clothes you don’t care about). Work in small sections, take frequent breaks, and consider a scaffold or sturdy platform instead of a ladder — you’ll be looking up for hours, and stability matters.
Ceilings also reveal every imperfection once painted, so be extra careful with scraping pressure. Plastic tools only, light touch, and thorough paste removal. If the ceiling is textured (popcorn, etc.), wallpaper removal gets significantly harder — in that case, honestly consider whether covering it with new drywall or a skim coat might be smarter than removal.
Practical Takeaway
Identify your wallpaper type, start with the gentlest removal method, use scoring plus hot water or steam for stubborn paper, always remove every trace of paste residue, and seal any drywall tears with shellac primer before painting. Patience is the real tool here — the walls will be there tomorrow, and rushing is what causes damage. Do it right once and you’ll never dread this job again. This Old House’s wall preparation guides offer additional pro techniques for tricky removals.